SmartyCentral
SmartyCentral is a feature of SmartyGrants that enables users to have a central instance account that can be set up and linked to other SmartyGrants accounts. This allows for certain information to be standardised and flow to the linked accounts.
Linked accounts overview
Users of SmartyCentral are able to view the accounts linked to the SmartyCentral instance.
Viewing linked accounts
To view the list of accounts that are currently linked to SmartyCentral, select the Linked Accounts icon:

This will display the list of accounts linked to SmartyCentral.
Info: These instances will receive updates when Financial Periods are created or updated in SmartyCentral.
Filtering linked accounts
You are able to further filter the list of account by using the filter bar:

Account ID: Filter by the Account ID number.
Account Name: Filter by the Account Name.
Account Status: Filter by the Account Status (Active or Locked).
Subscription Type: Filter by the Subscription Type.
Downloading a list of linked accounts
To download an Excel spreadsheet of the list of accounts linked to SmartyCentral select Download:
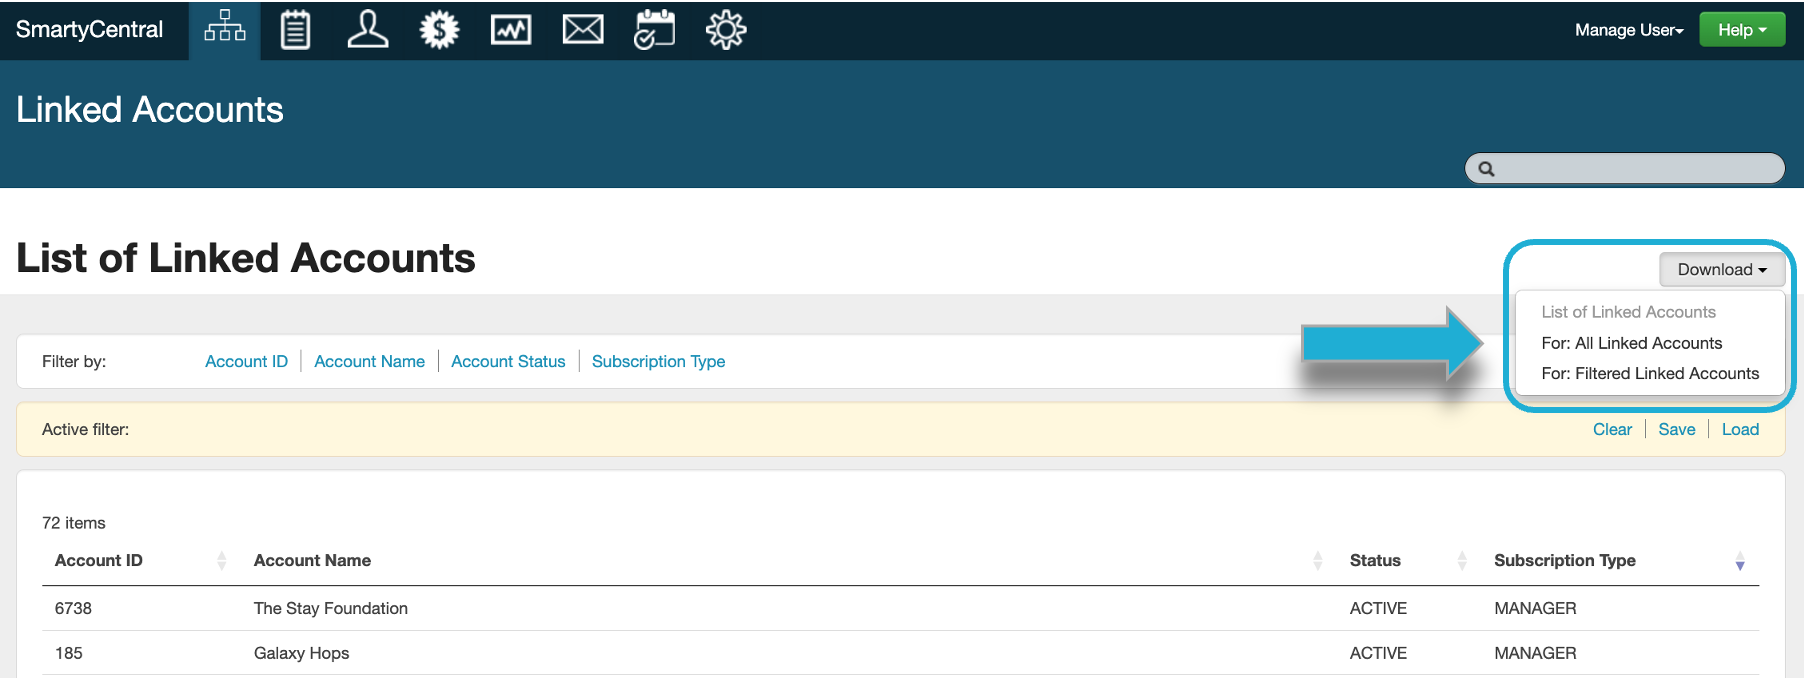
For: All Linked Accounts: Download a spreadsheet of all accounts linked to SmartyCentral.
For: Filtered Linked Accounts: Download a spreadsheet of the filtered list of accounts.
Creating and managing financial periods
Financial periods allow for grant payments to be tracked across periods of time such as financial years. Users of SmartyCentral are able to create and manage financial periods for use across all linked accounts.
Creating new financial periods
Warning: Financial periods that are configured in the SmartyCentral Account will appear in all linked Accounts. This means that any changes to financial periods will apply to all Accounts.
To create a new financial period in SmartyCentral:
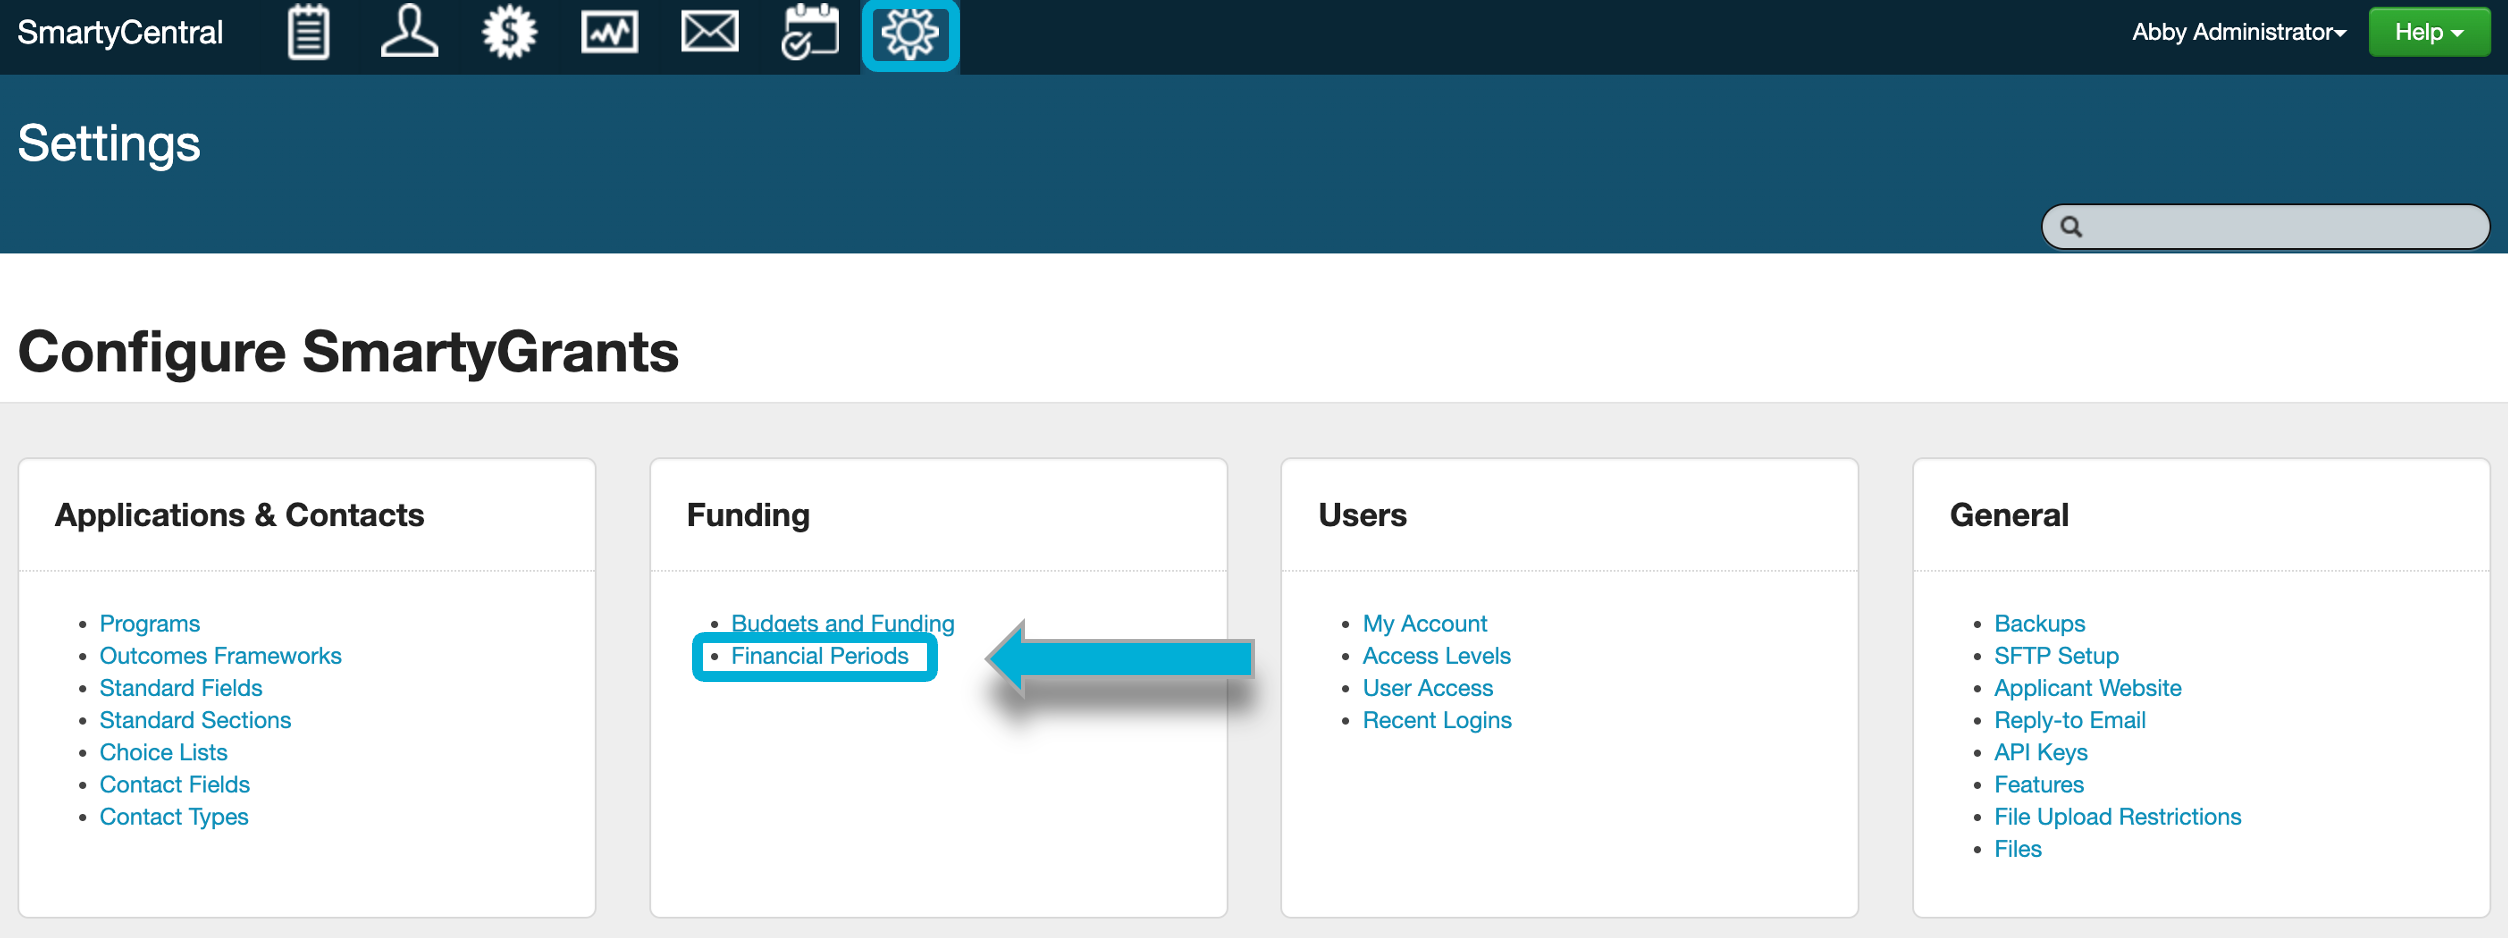
Go to your Account Settings via the cog icon and select Financial Periods.
Select Create Financial Period.

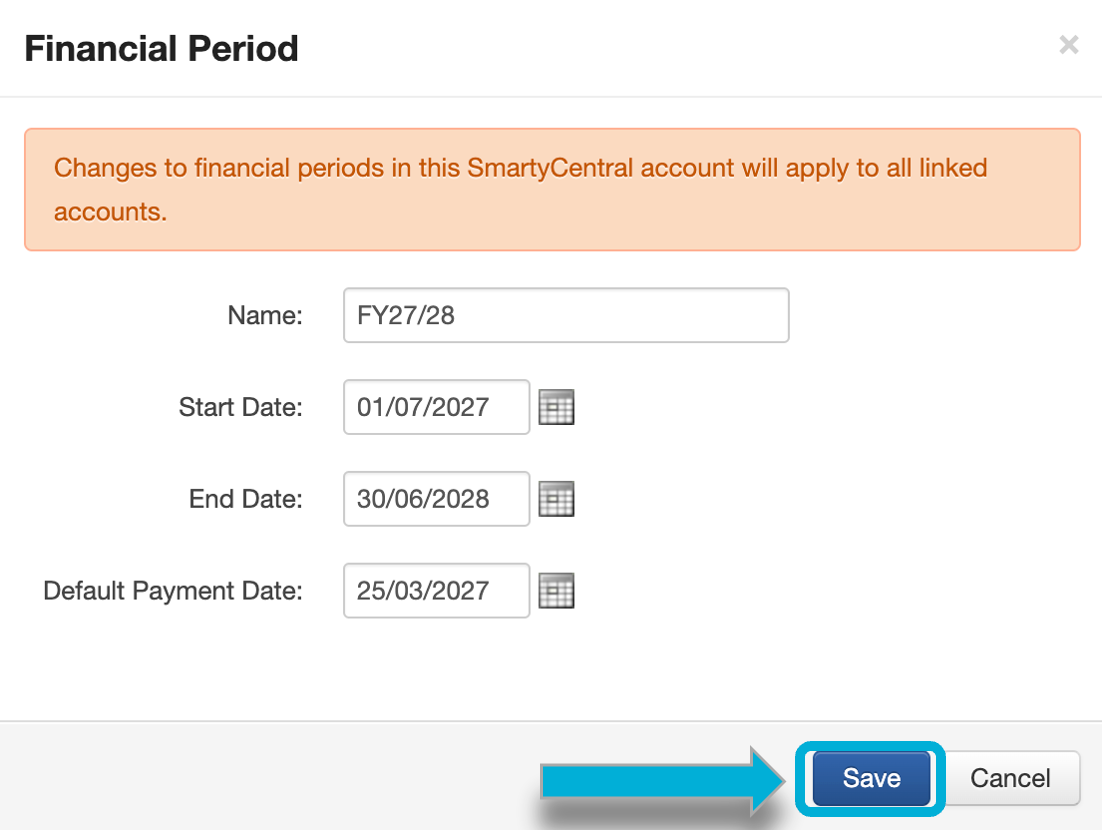
Fill in the required details, including the Name of the Financial Period (e.g. FY24/25), the Start Date and End Date, and the Default Payment Date. Select Save to finish, but please note the displayed warning in orange. Creating a new Financial Period in SmartyCentral will also create it in all linked accounts.
Editing financial periods
To edit an existing financial period, select Options next to the relevant Financial Period, then select Edit:

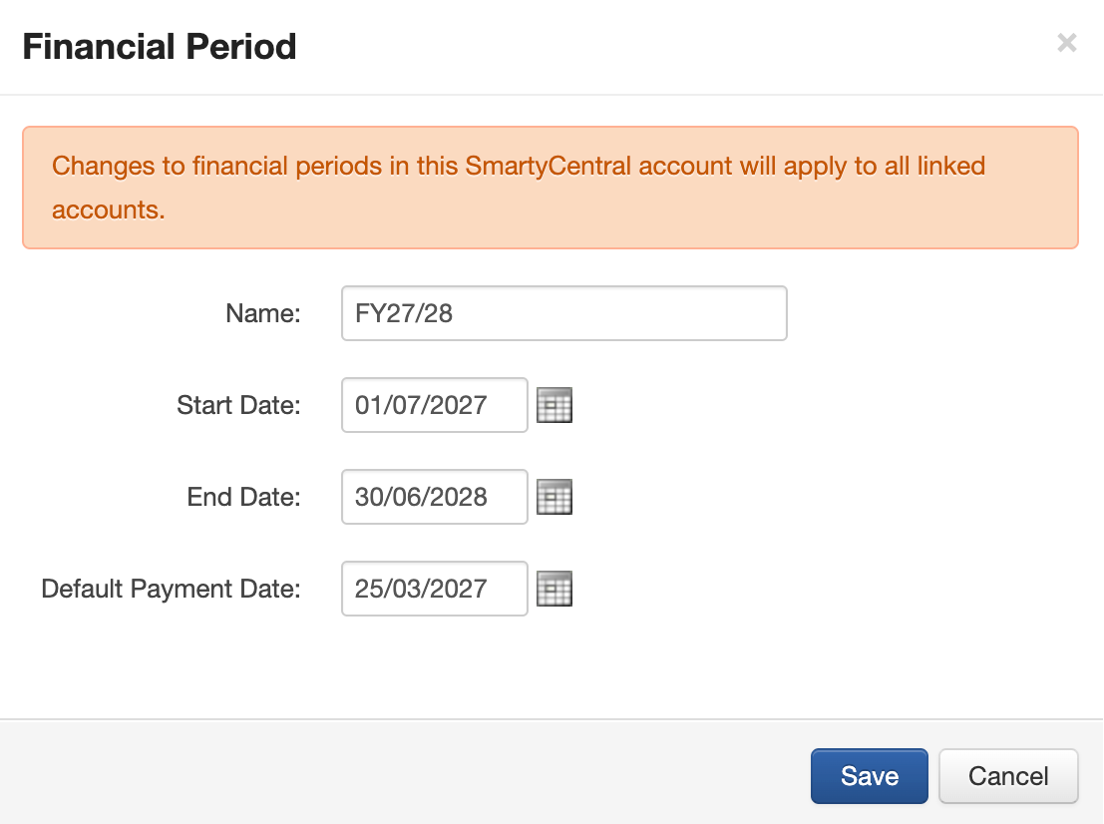
This will take you to the details for the financial period that you may edit. Before selecting Save, note the warning that this action will apply to all linked accounts.
Deleting financial periods
You may delete financial periods, however please consider the following:
If the financial period is not in use in the linked Accounts, it will be deleted from those Accounts.
If the financial period is In Use (see highlighted in the image below) in any linked Accounts, it will not be deleted from those Accounts, so that payments are not disrupted. It will simply unlink them from SmartyCentral and they will become fully editable within the linked Agency Account.
To delete a financial period, select Options and then Delete:

Info: A financial period is In Use when one or more linked accounts have used it in a budget allocation.
Linked account perspective
As financial periods are created and managed in SmartyCentral, linked Accounts are limited in their actions.
When selecting Edit against a linked financial period, the linked account user will see the Name, Start Date, and End Date as uneditable fields. They can however edit the Default Payment Date:

Info: Agencies are unable to delete financial periods that are managed by SmartyCentral.
Form templates
Form templates can be set up in the SmartyCentral account to appear on the Copy Form page of any linked account. This allows users to standardise the forms that are being used by each of the linked accounts.
To create your form templates, you will need to ensure your forms are created in a specific program in the SmartyCentral account.
Once the form templates have been created, contact us at service@smartygrants.com.au to enable these forms on your linked accounts.
Tip: More than one set of form templates can be established within your SmartyCentral account. To do this, create each set of form templates in different programs. Note that linked accounts can only be linked to one set of form templates.
Info: This would override the default ‘best practice’ templates maintained by SmartyGrants that appear on the Copy Form page in all SmartyGrants accounts.
Locked sections
SmartyCentral users have the ability to ‘Lock’ particular sections within their template forms. Once the form is copied into any linked account, that Locked Section cannot be edited, moved or deleted by a manage user in the linked account.
Tip: If you would like users to be able to move a locked section or page (but not edit or delete), you can request this to be enabled in the linked account instance.