Sharing, importing, and exporting dashboards

Analytics is an embedded reporting tool that allows you to create, monitor, and export live dashboards that visualise data about your grants.
This article delves into sharing, importing and exporting your dashboards. If you want to share the results of a dashboard with your colleagues, or download your custom widgets for a PowerPoint presentation, this article is for you.
Table of contents
Downloading data, images, and PDFs of dashboards/widgets
It is possible to download whole dashboards or individual widgets.
The entire dashboard can be downloaded as either an image or a PDF, as per the below steps:
Hover over the dashboard name in the left-hand dashboard management panel, the menu icon (three vertical dots) will appear. Select Download for further options:
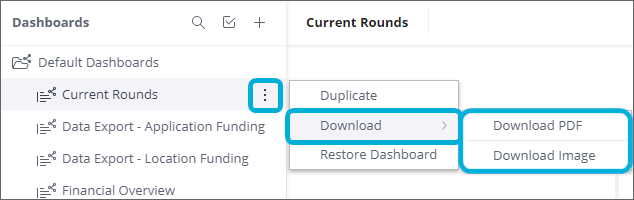
When you select Download PDF or Download Image, a pop-up dialogue will appear with various options:
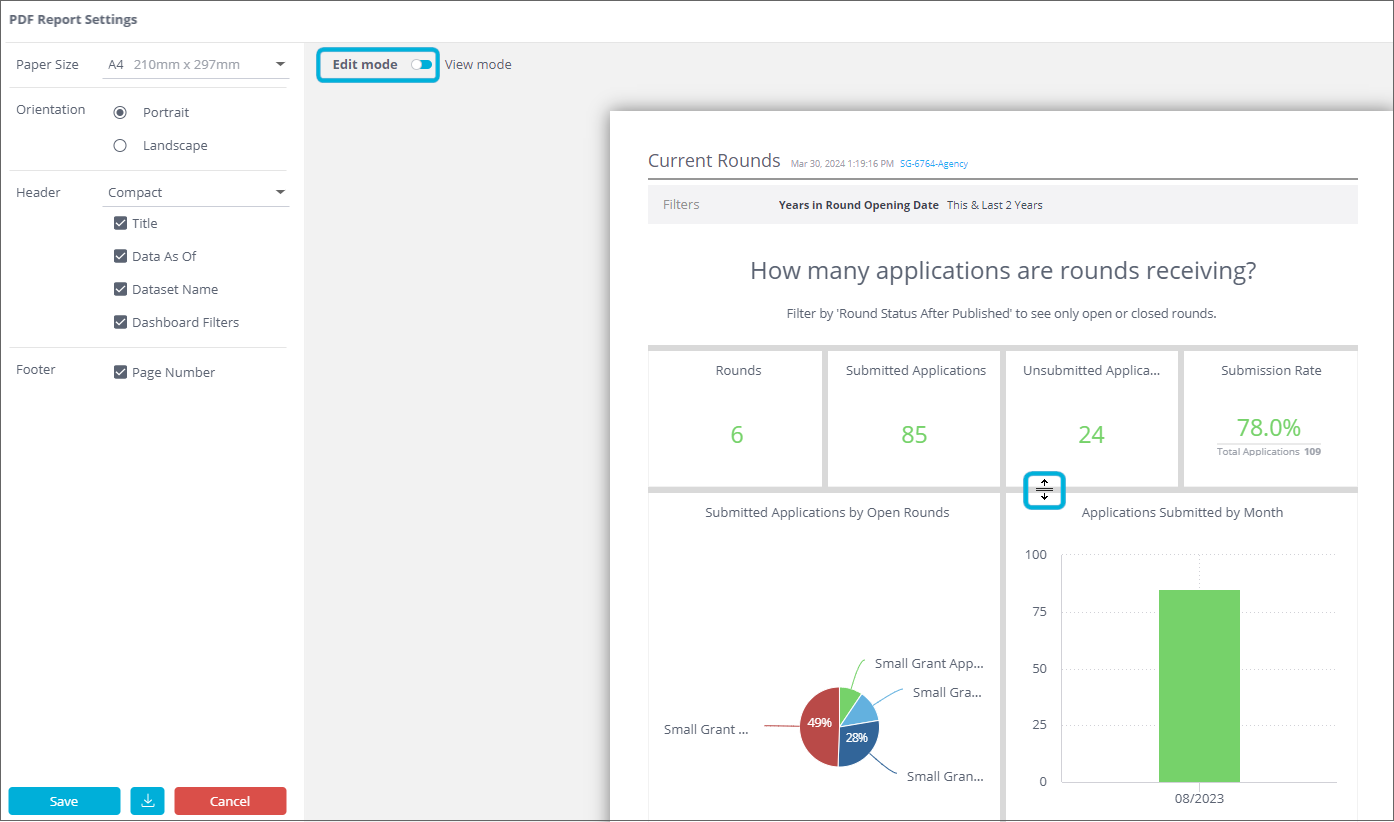
Download PDF: Paper Size, Orientation, Header details (Title, Data As Of, Dataset Name, Dashboard Filters), Footer details (Page Number).
Download Image: Width (pixels), Show Dashboard Title, Show Dashboard Filters, Show Data Set Info.
The top of an open dashboard has a menu icon with the same options, and a quick-export PDF icon
 to save having to navigate the menu:

Note that when exporting a PDF, there is a feature called Edit mode, enabled with a toggle, that allows for the resizing of widgets to your liking by selecting and dragging the grey bars between them:
Once you have configured the various download options, then:
if downloading the dashboard as an image, select Download,
if downloading a PDF of the dashboard, select the downwards pointing arrow
 to download the PDF. Selecting Save allows you to save the configuration for future PDF downloads. Select Cancel if you change your mind and don't wish to download the dashboard as a PDF:

Individual widgets can be downloaded as images, CSV files, Excel files (in the case of Pivot Charts only) or PDF (Pivot Chart + Table widgets only). The use case for CSV and Excel files is that it provides the underlying data beneath a widget, allowing for quasi-data dumps. To download an individual widget:
Hovering over the widget of interest, select the menu icon (three vertical dots) in the top-right corner and select the desired download format:

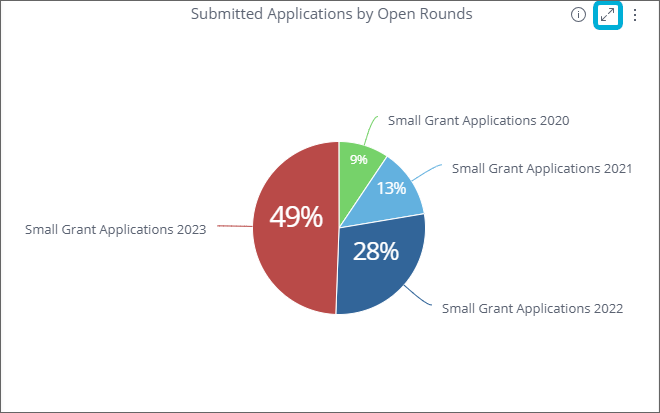
Note also the full-screen icon (diagonal arrows) to the left of the menu icon, which allows an individual widget to be instantly viewed at a larger size:
Exporting and importing dashboards
The entire dashboard can be exported by simply selecting the 3 vertical dots menu to the right of the dashboard name and selecting Export:
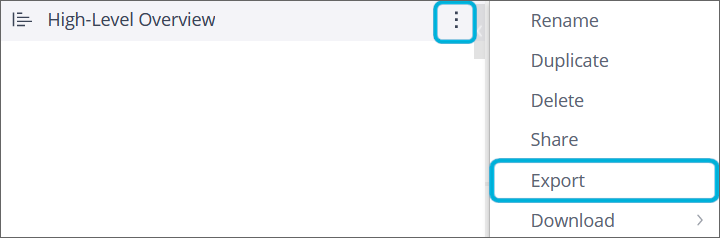
This downloads a file with a '.dash' extension appended to the name of the dashboard, for example: <<High-LevelOverview.dash>>.
Multiple dashboards can also be exported in one operation:
In the left panel (the dashboard management area) select the tickbox
 at the top.
Select all the dashboards you want to export. To export all the dashboards in a folder, select the checkbox next to the folder, otherwise select individual dashboards.
Scroll to the bottom of the screen and select the export
 icon:
icon:
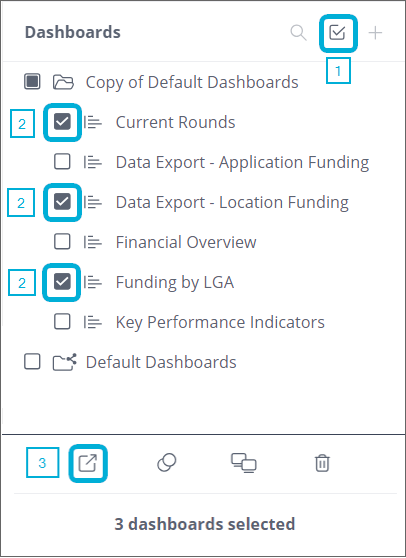
An 'exportDashboards.dash' file is created containing the selected dashboards.
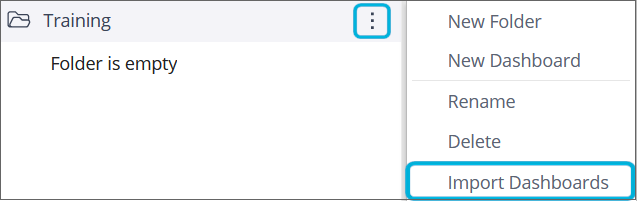
The '.dash' file can then be provided to another SmartyGrants user who can import it into their Analytics by selecting the dashboard folder they want to import the dashboard into, then the 3 vertical dots menu to the right of the folder name, and then selecting Import Dashboards:
After importing a '.dash' file that was exported from a different account, you may see an error referencing the data source of the source account which your current account doesn't have access to:
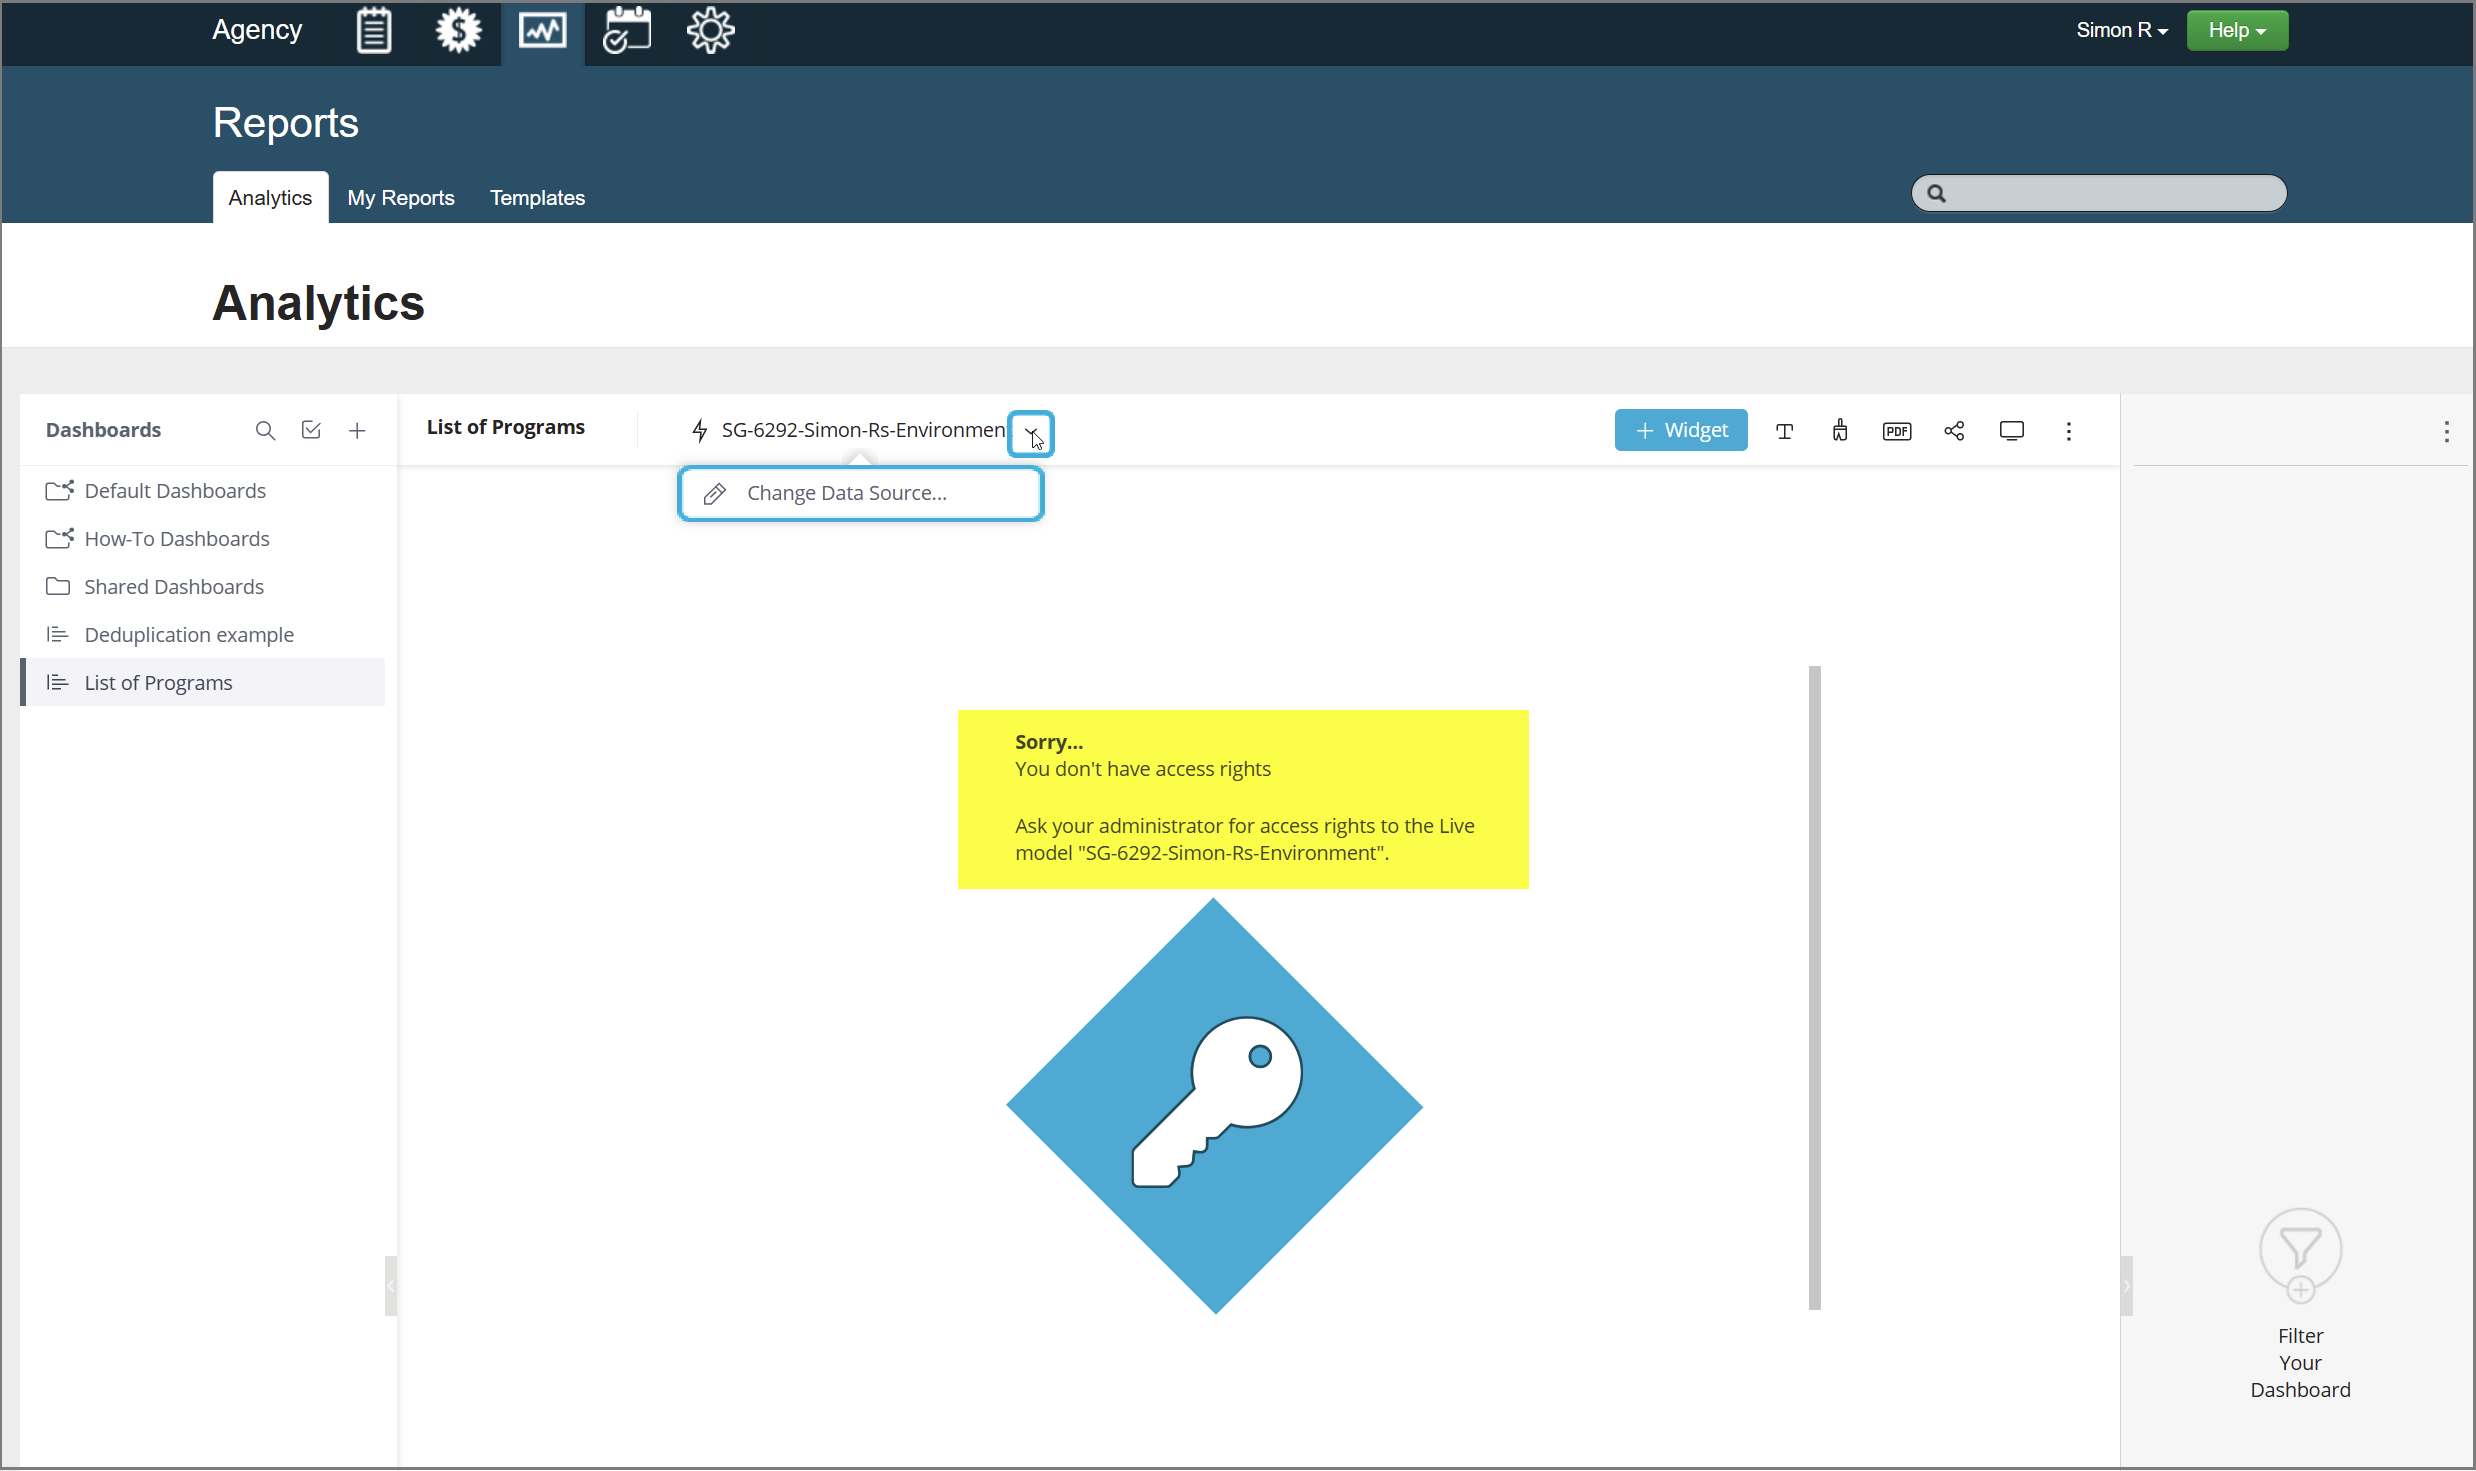
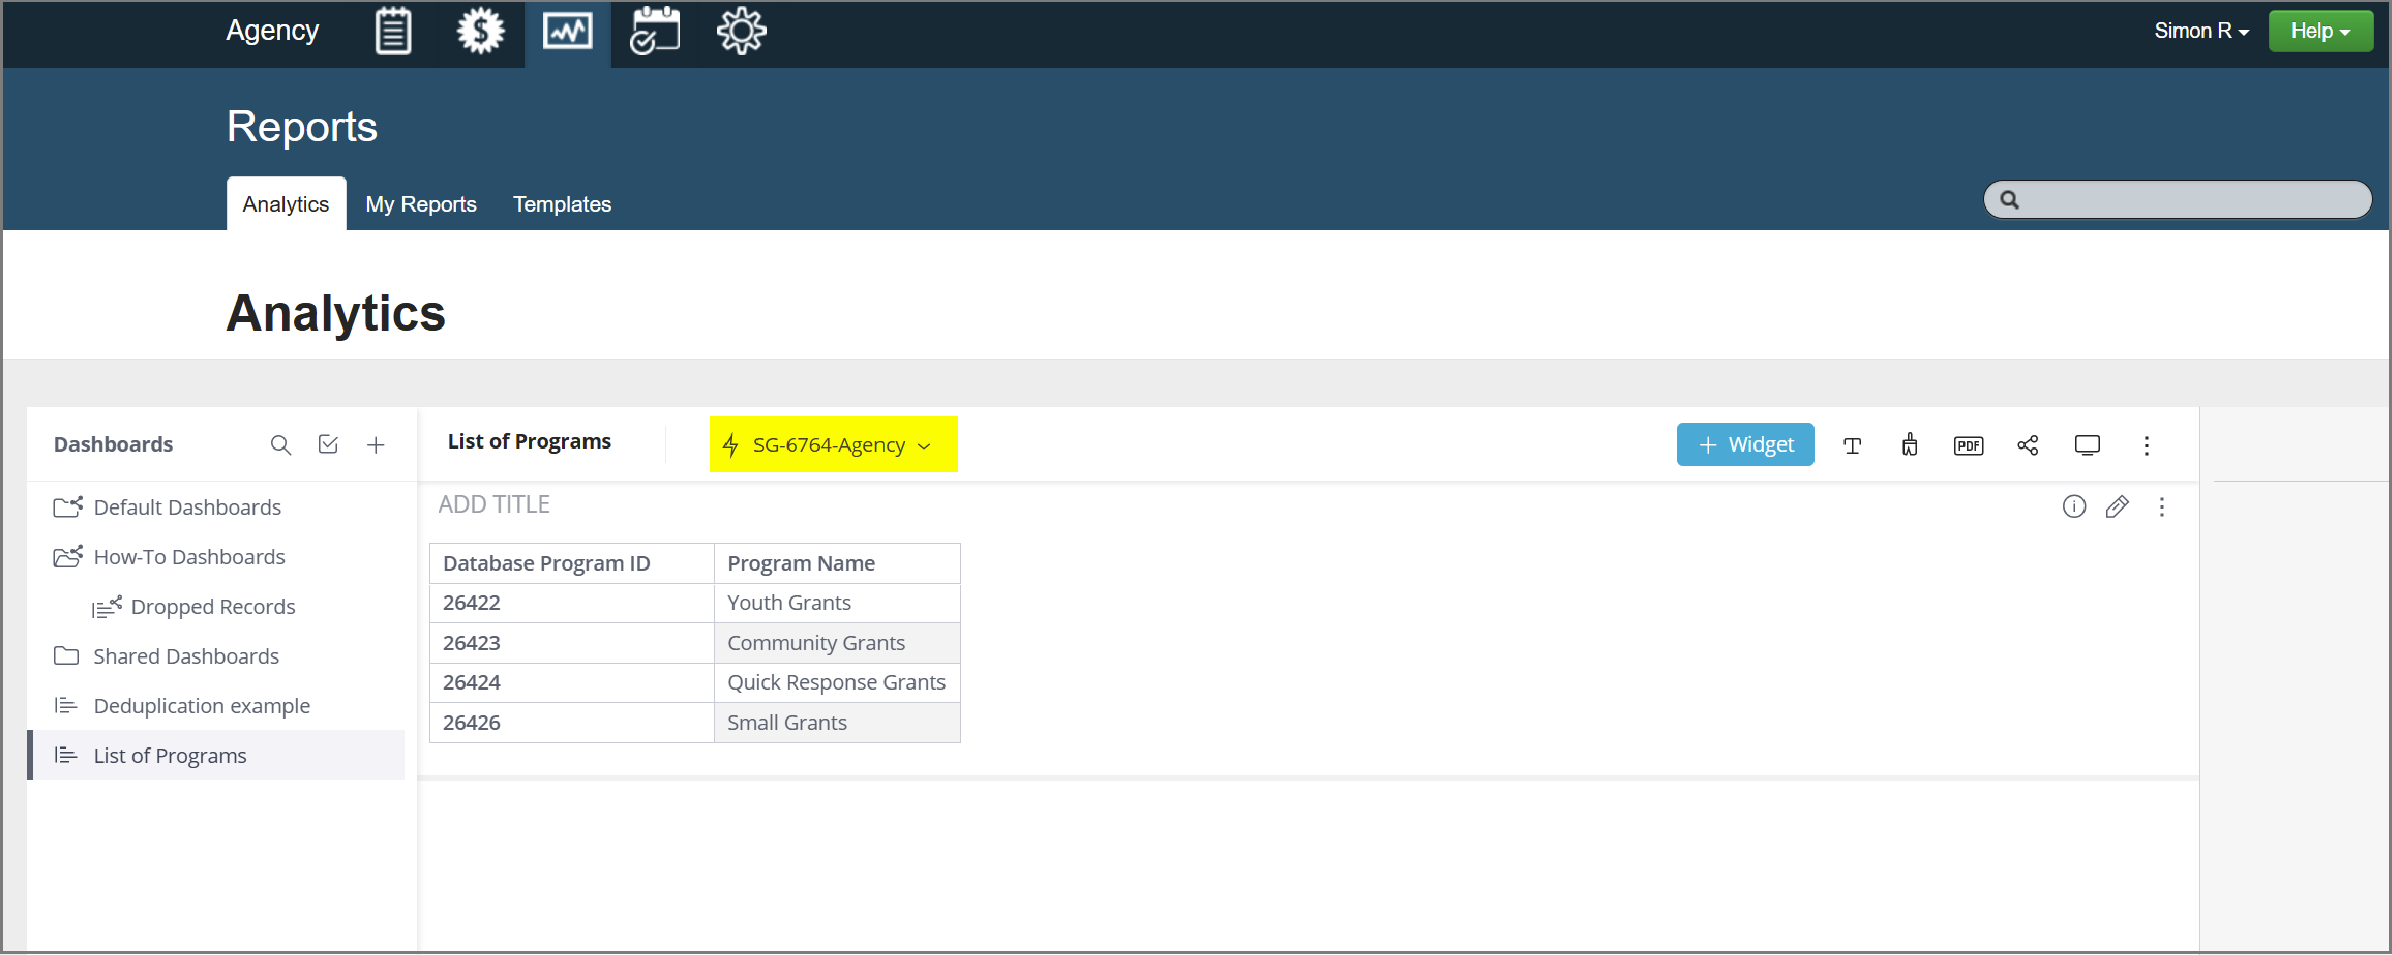
To resolve this, either just refresh the Analytics page (or log out and back in), or you can click on the data source dropdown and select 'Change Data Source...' and select the one in the list. After any of these actions, the dashboard should render the data without error:
If a user tries to import dashboards that already exist in their Analytics screen, they will be notified of this and given options to Skip/Duplicate/Overwrite the dashboard. The user can decide on an individual per dashboard basis, or choose to Skip All / Duplicate All / Overwrite All:
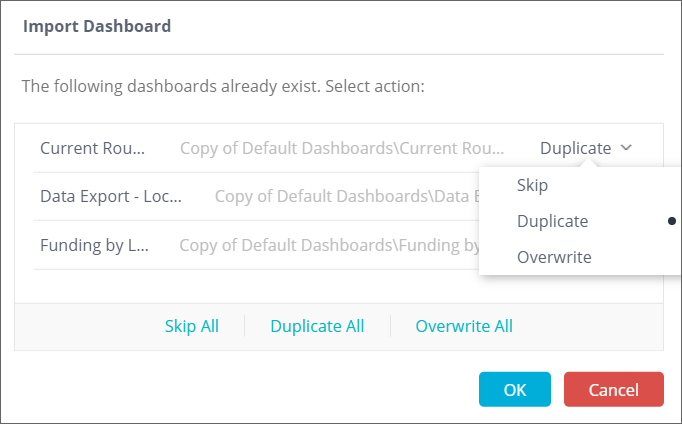
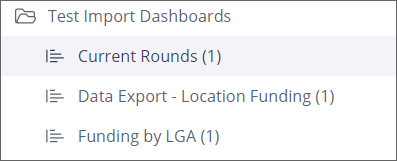
Any duplicated dashboards will have a number suffixed to their name, for example:
Tip: Exporting your dashboards is a good way to back them up.
Info: the '.dash' file includes the structure of the dashboard and does not contain data. When the user imports a '.dash' file, the imported dashboard/s only show data from their own accounts. They do not show any of the data from the accounts of the user who created the dashboard, unless the user importing the dashboard/s also has access to those accounts.
Restricted data views based on user access
Analytics allows each user to only view data from their account. Even if a dashboard is shared with/exported to another SmartyGrants user of a different account, the dashboard will only retrieve the data that is from the user's own account.
Sharing dashboards
There are 2 ways to share dashboards:
By one user exporting a dashboard and another user importing the '.dash' file, as described in the Export/Import of dashboards section above. Note that this is a static method. If the sharing user updates their dashboard, the recipient does not receive any automatic update or notification.
By using the Share option as described in this Sharing dashboards section. This is a collaborative option, meaning that users who share their dashboards can update them and the recipient will receive the changes.
Dashboard owners/administrators can share dashboards with other SmartyGrants users to view in their own accounts. When the other users open dashboards shared with them, the dashboards only show data from their own accounts (not the account/s of the user who created the dashboard).
There are some restrictions with sharing dashboards:
System-wide account users with the Designer Analytics reporting role will be able to share dashboards with all other users in the same account.
Program-specific account users with the Designer Analytics reporting role (i.e. Program Managers) can share dashboards with all other users in the same account.
Account users with the Viewer Analytics reporting role are unable to share dashboards.
To share a dashboard
Follow the below steps to share a dashboard with other SmartyGrants user/s:
Important: Users will only come up in the share list if they have accessed the Analytics tab previously.
In the heading of your dashboard, select Share
 .
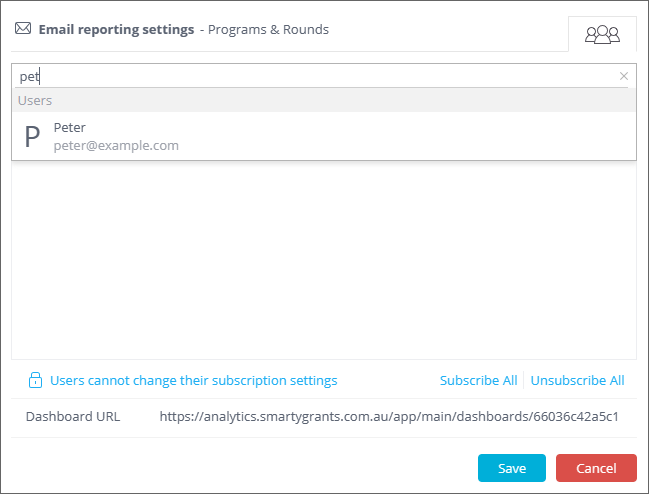
.In the top search bar (Enter names, email addresses, groups or Tenants) start typing either a person's name or their email address, and the system should prompt you with possible suggested entries that you can select. You can search and add more users iteratively:
Alternatively, you can share with all users in your account by typing in the name of your account (in the example below we select '6764 Agency', where 6764 is the internal Account ID):
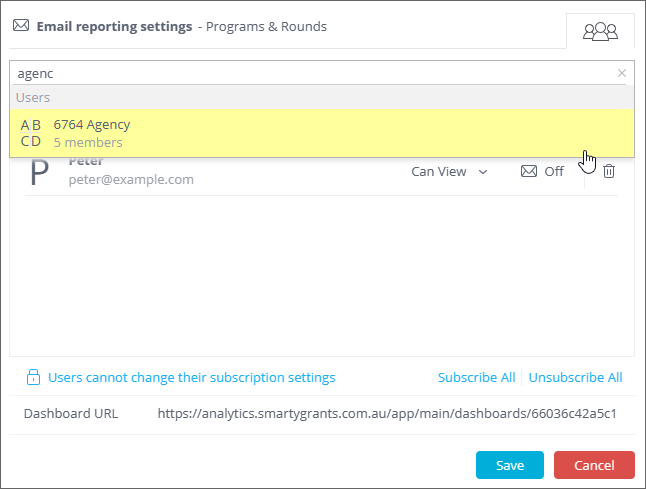
The selected recipients/groups are shown in the centre of the window and are displayed the next time you open this window:
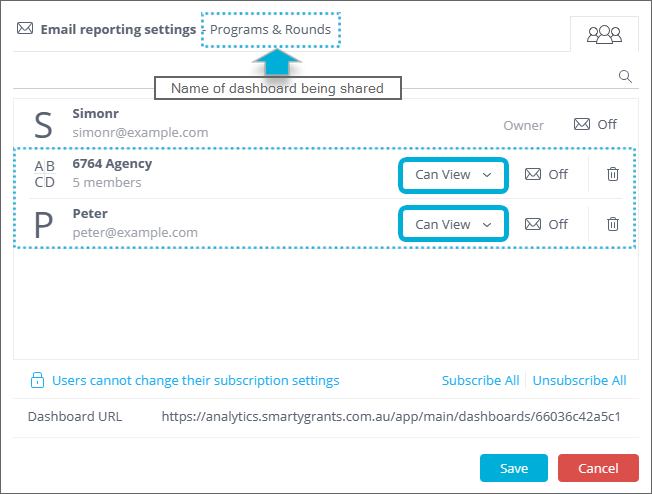
In the dropdown menu next to each user/group, select whether the recipient/s will have a Designer or Viewer role for the shared dashboard:
Can Design: a designer user access level with dashboard editing rights.
Can View: a viewer access level (viewing dashboard with filtering rights).
Ignore the
 Off / On button next to each user/group. Also, ignore the Subscribe All / Unsubscribe All and Users can change their subscription settings / Users cannot change their subscription settings links, as these are not currently used.
Select Save.
Info: any changes recipients make in the dashboard do not affect the Owner's dashboard. The recipient's changes are applied to a separate copy of the dashboard to which only they have access. Recipients can revert to the Owner's latest shared copy at any time by selecting Restore Dashboard (see the section Restoring a Shared dashboard below).
Info: If a user does not have 'Can Design' and only has 'Can View', this is because of their SmartyGrants User Access level (see the User access section above).
What the recipient sees
When a dashboard is shared, the  icon appears next to the dashboard name in the recipient's Dashboards navigation panel. If the dashboard was in a folder when it was shared, then the dashboard is shared using the same structure (under the same folder). Both the shared folder and shared dashboard show the
  icon:
icon:

The options available to the recipient given Designer access include Rename / Duplicate / Export / Download / Restore Dashboard.
The options available to the recipient given Viewer access include Duplicate / Download / Restore Dashboard.
Neither Designer nor Viewer recipients can delete the shared dashboard or its folder.
Updating shared dashboards
There are two ways to update a shared dashboard:
Republish: the Dashboard Owner makes a change to the dashboard and republishes it so all recipients will see the changes as soon as they log in or refresh their dashboard.
Restore: a recipient restores the shared dashboard which they had changed, back to the state in which it was shared with them by the owner.
These two ways are described in more detail below.
Republishing dashboards
When a dashboard is shared, a link is created between the Dashboard Owner's dashboard and the shared (copy) dashboard. This enables the owner to subsequently make changes to their dashboard and republish it so that the recipient will see the changes.
When a Dashboard Owner modifies a dashboard which they have already shared, it is not automatically updated for the recipients. The Dashboard Owner must republish their dashboard. Once it is republished, the recipients will see the changes as soon as they open/refresh the shared dashboard.
When a dashboard that has been shared with at least one other user has pending changes that have not yet been published, the Share icon on the dashboard is highlighted in blue, as an indicator that until the dashboard is republished, the recipients do not have the latest dashboard:

To republish a dashboard:
In the heading of your dashboard or in the Dashboards list, select the three dots (menu) and select Republish.
Restoring a shared dashboard
Recipients can modify shared dashboards by, say, changing filters. If required, they can remove all of their local modifications and restore these dashboards to the state in which they were shared.
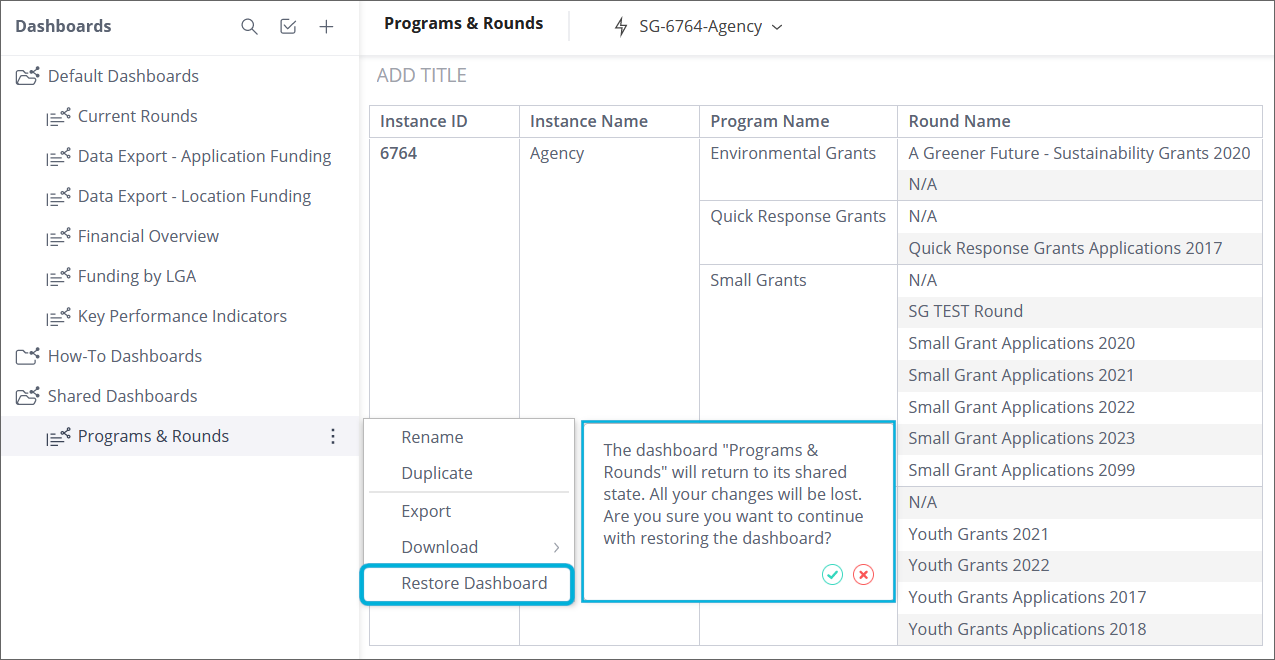
To restore a shared dashboard:
In the heading of your dashboard or in the dashboards list, select the three dots (menu) and select Restore Dashboard.
Confirm that you want to restore the shared dashboard:
Tip: To keep their customised shared dashboard, recipients should save their modified shared dashboard as a new dashboard before restoring it. This can be done using the Duplicate followed by Rename functions.
Stop sharing a dashboard
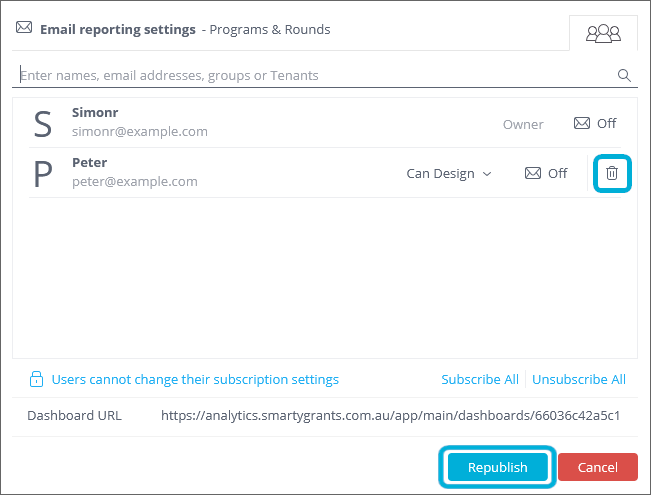
The Dashboard Owner can stop sharing a dashboard they previously shared with other users. To stop sharing a dashboard:
In the heading of your dashboard select Share
 , or in the dashboards list select the three dots (menu) and select Republish.
Select the trash can against each user/group that you no longer want to share the dashboard with.
Select Republish.
Recipients will still be able to use any duplicated copies of the shared dashboard, however, they won't be able to restore it or receive any updates the Owner might make.
Changing ownership of a dashboard
A Dashboard Owner can transfer ownership of the dashboard to another user. Transferring ownership of dashboards can be useful when, for example, the Dashboard Owner leaves the company and you do not want to lose their dashboards.
When you transfer ownership of your dashboard to another user, the dashboard remains as a shared dashboard within your Dashboards list, and you become a recipient. As a recipient, you are limited to how you can modify the dashboard.
To transfer ownership of a dashboard:
In the heading of your dashboard, select Share
 .
.Enter the name of the user to transfer ownership to.
For the user you want to make an owner, change their access to Make Owner. In the below example, the shared user 'Peter' will become the Owner and the existing owner 'Simonr' will become a recipient (with Design access):
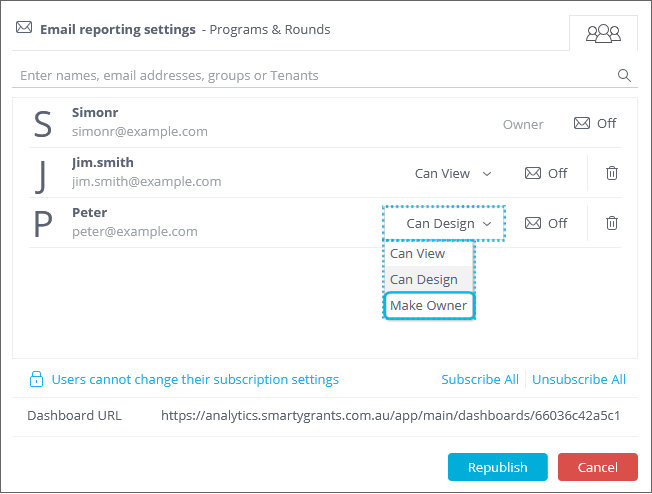

Select Republish to confirm that you want to transfer ownership to the user.