Go-live
This article walks through the features you’d use in grant administration when publishing a grant round. Understanding the SmartyGrants elements involved will ensure that your team can comfortably and efficiently manage applications, and your applicants can have a smooth application experience.
Table of contents
Publishing your first round
You’re ready to go live with your grant round on SmartyGrants – congratulations!
To refresh yourself on how rounds work, and to learn how to publish your round, please complete the LMS course below:
Creating and managing public and private rounds (≈ 10 minutes)
Once you have finished this course, return to this page and continue from Managing applications below.
Managing applications
After your round is published and open, you’ll start to receive applications in the system.
Applications that have been started, but not yet submitted, will show as Unsubmitted applications. At this stage, you’ll have access to only the most basic information about that application.
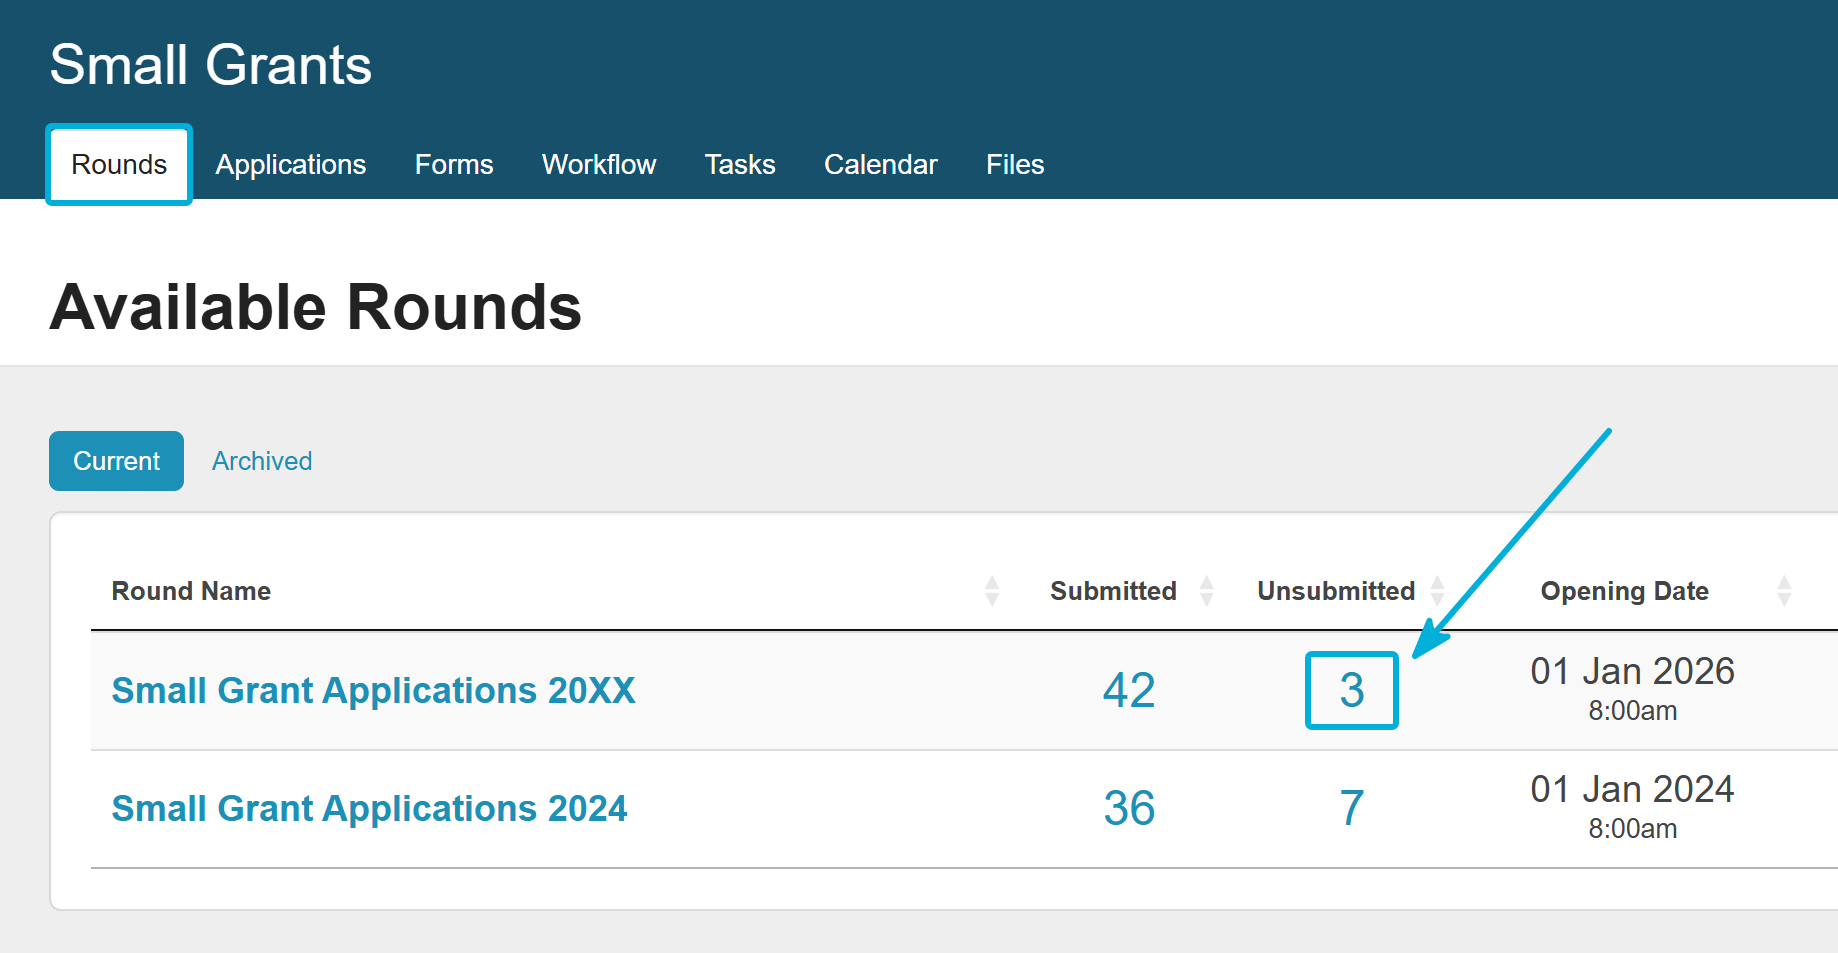
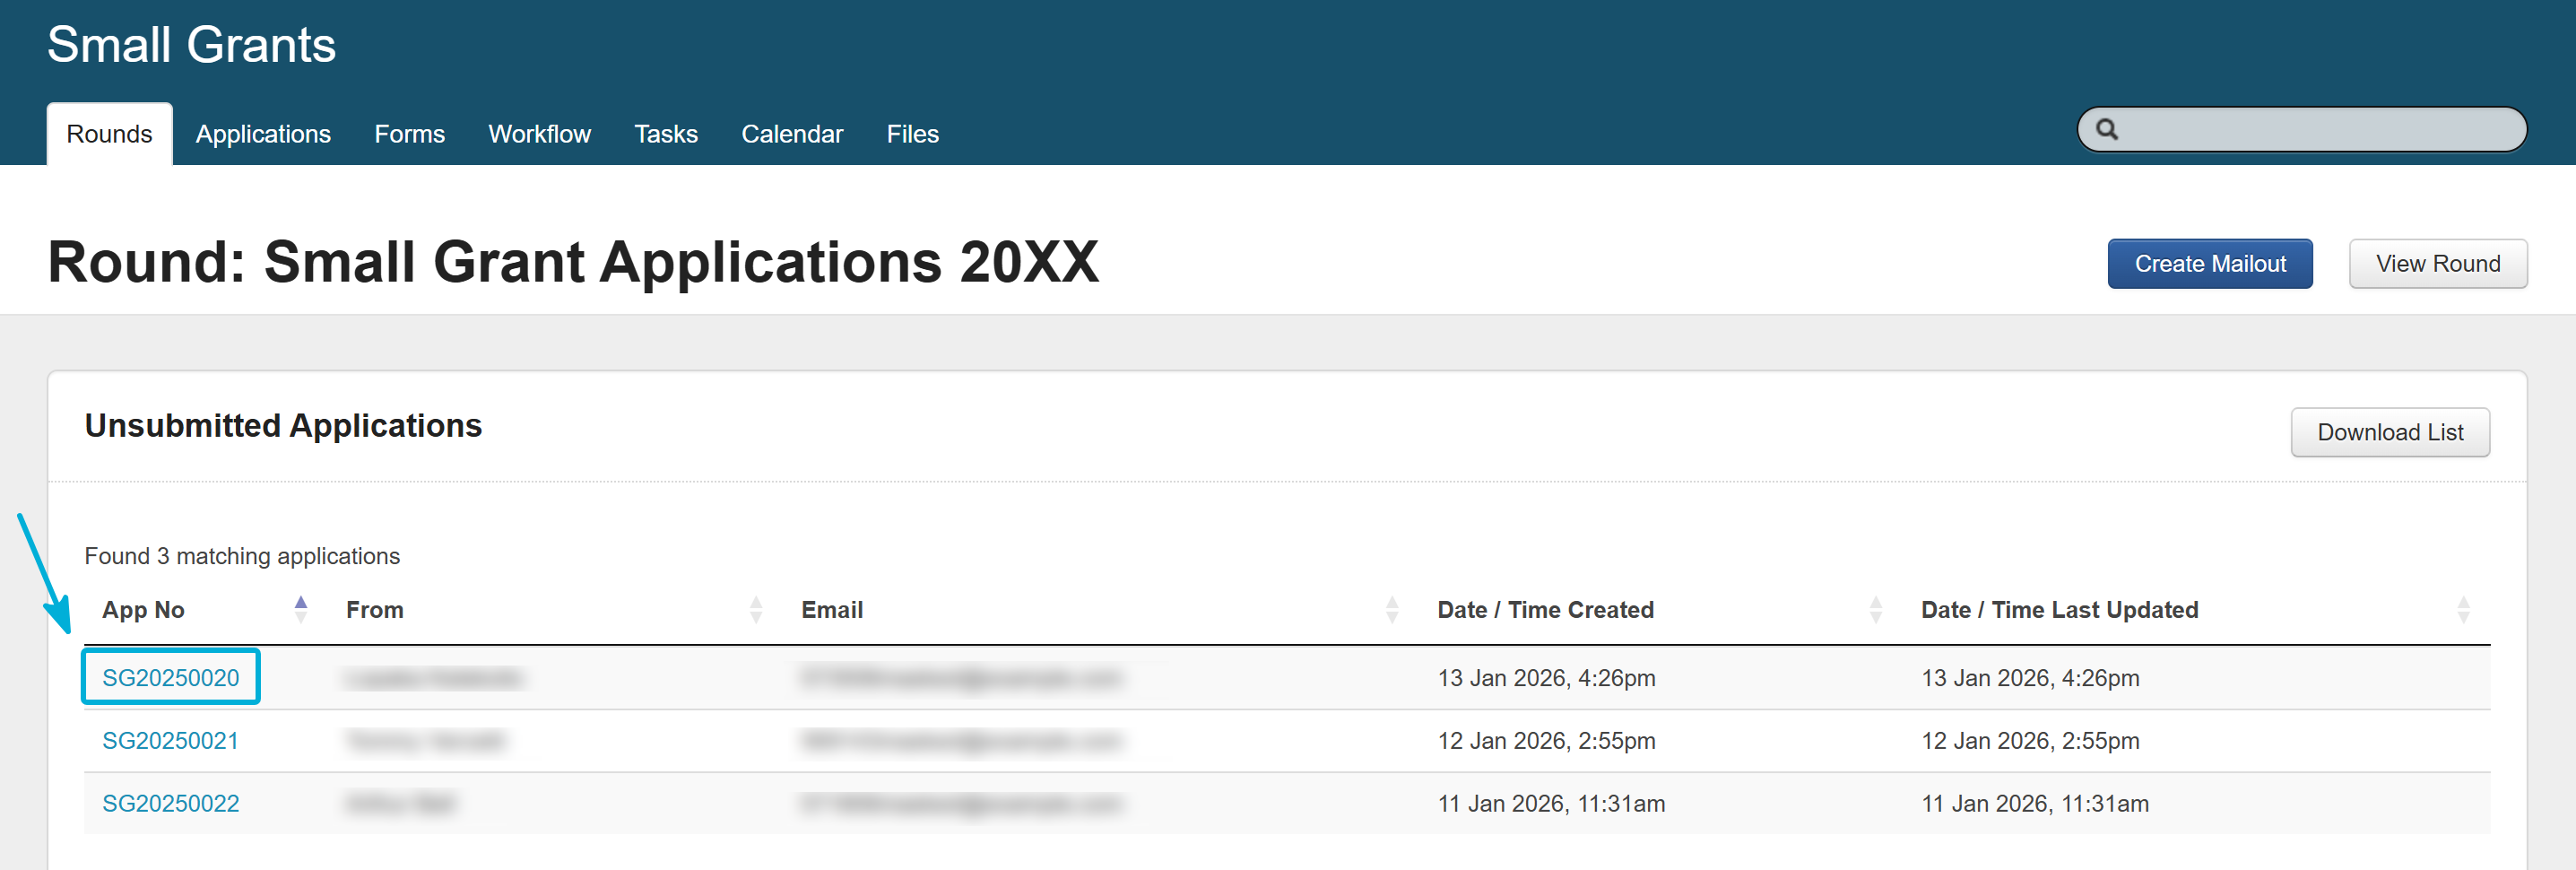
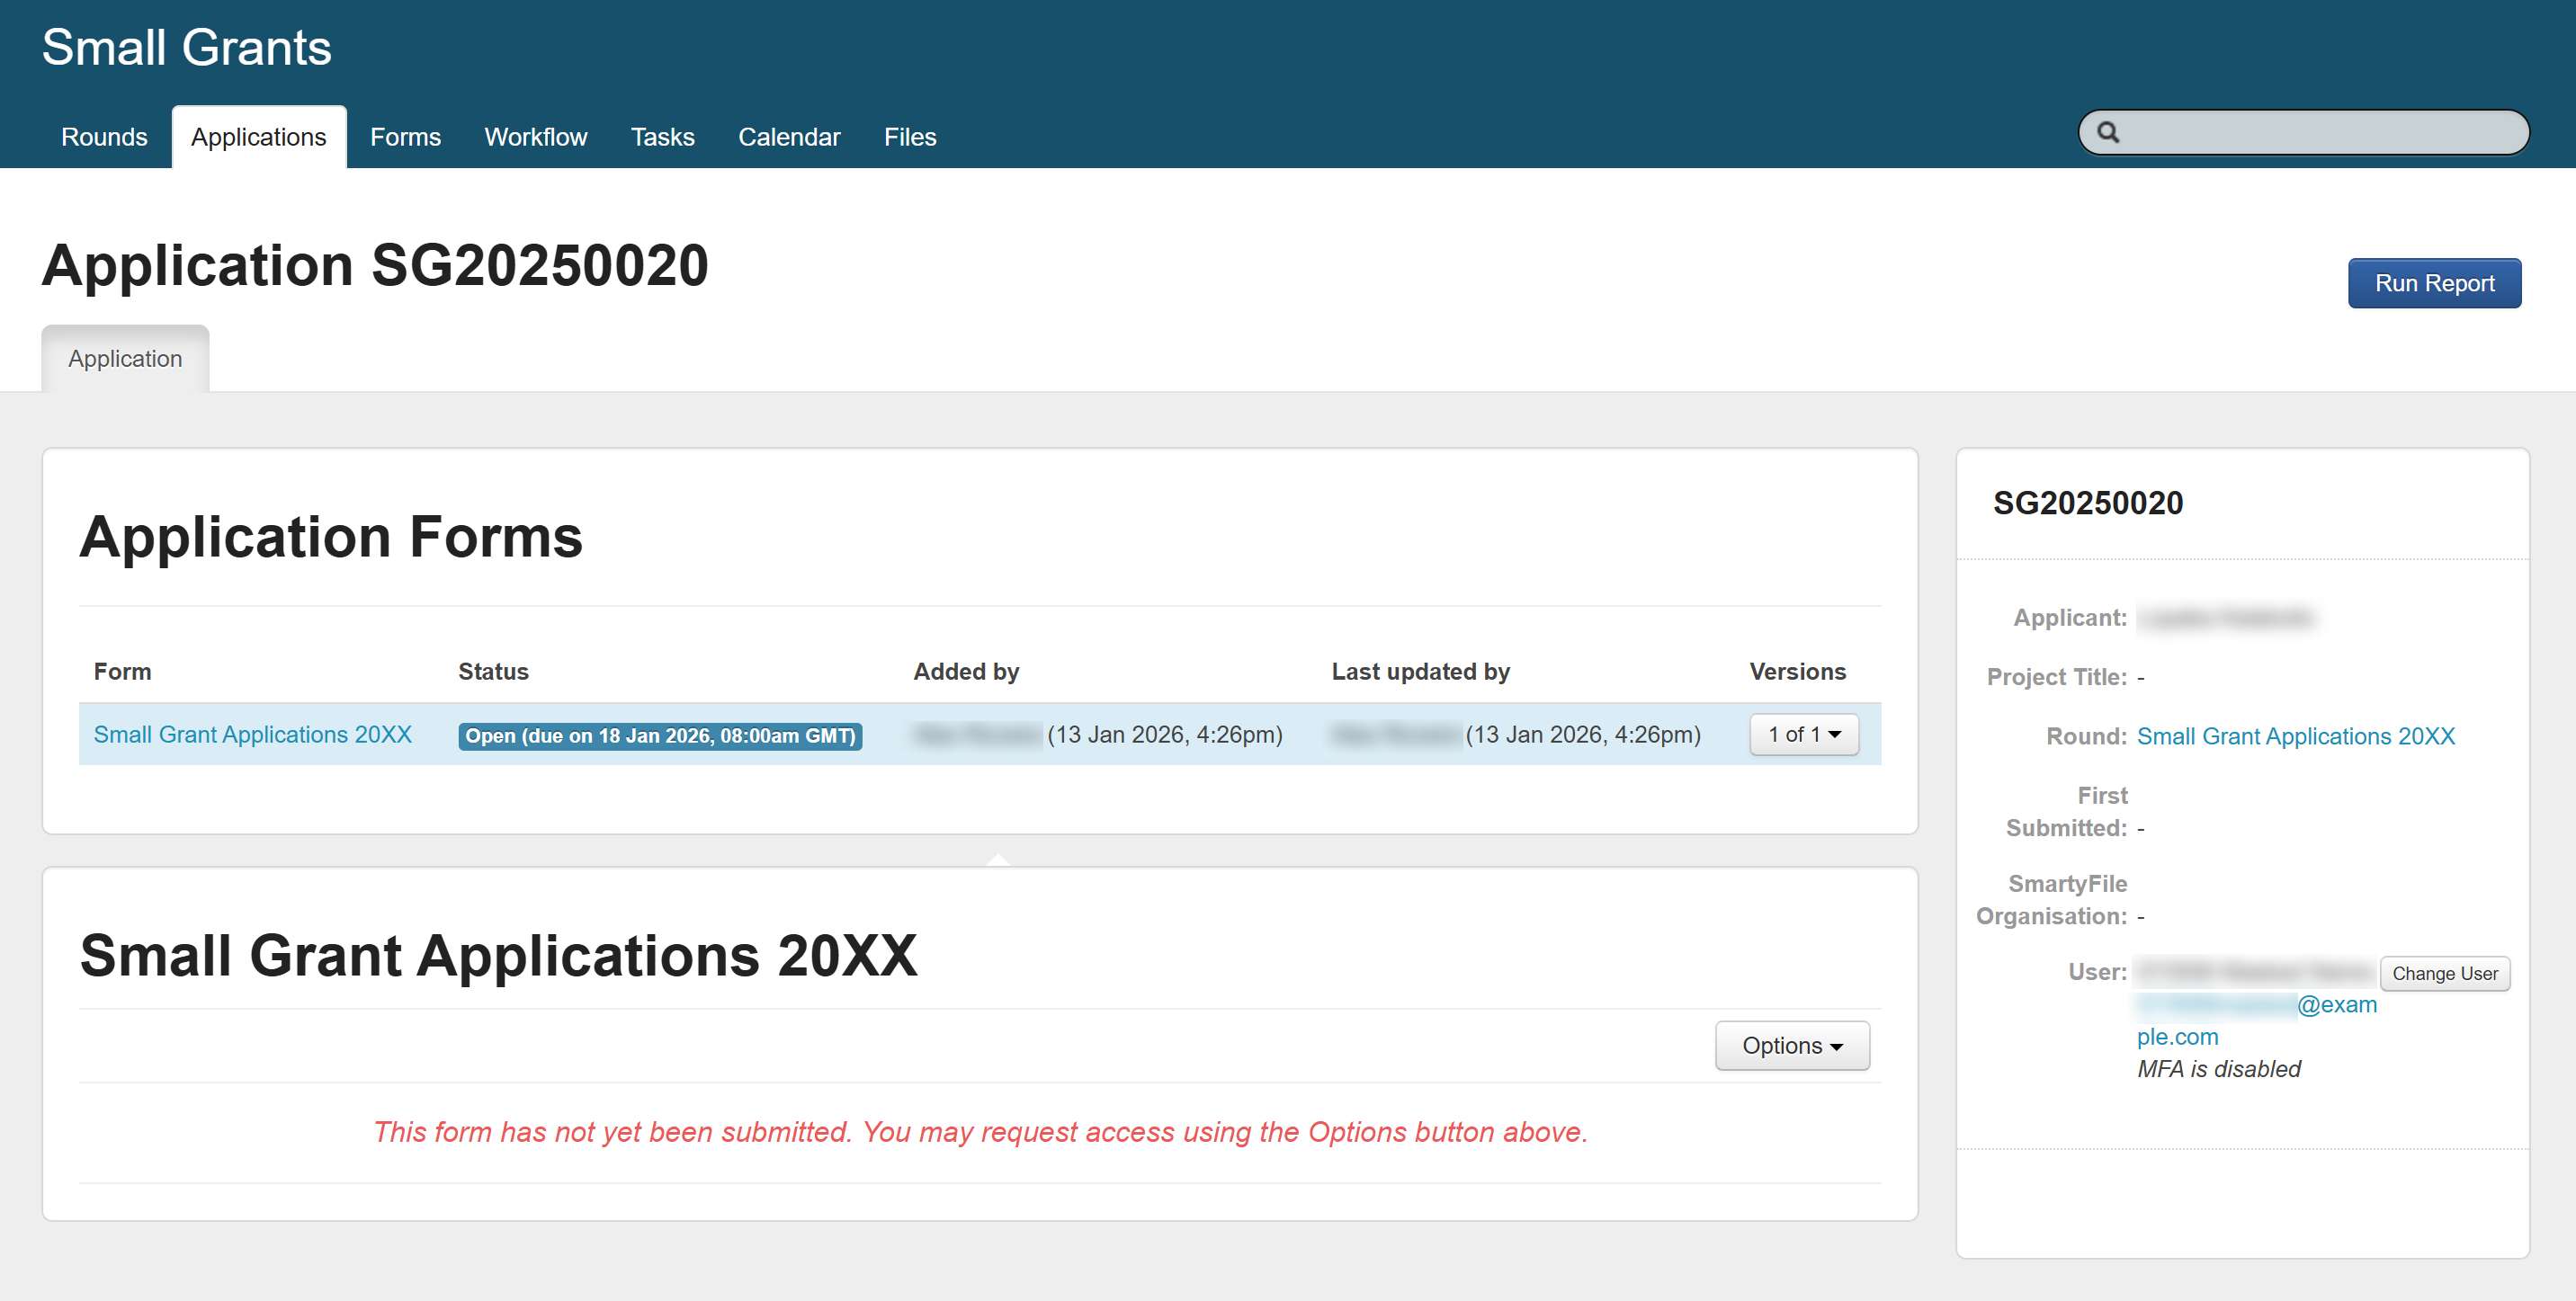
Once an application is Submitted, it will create a complete application record.
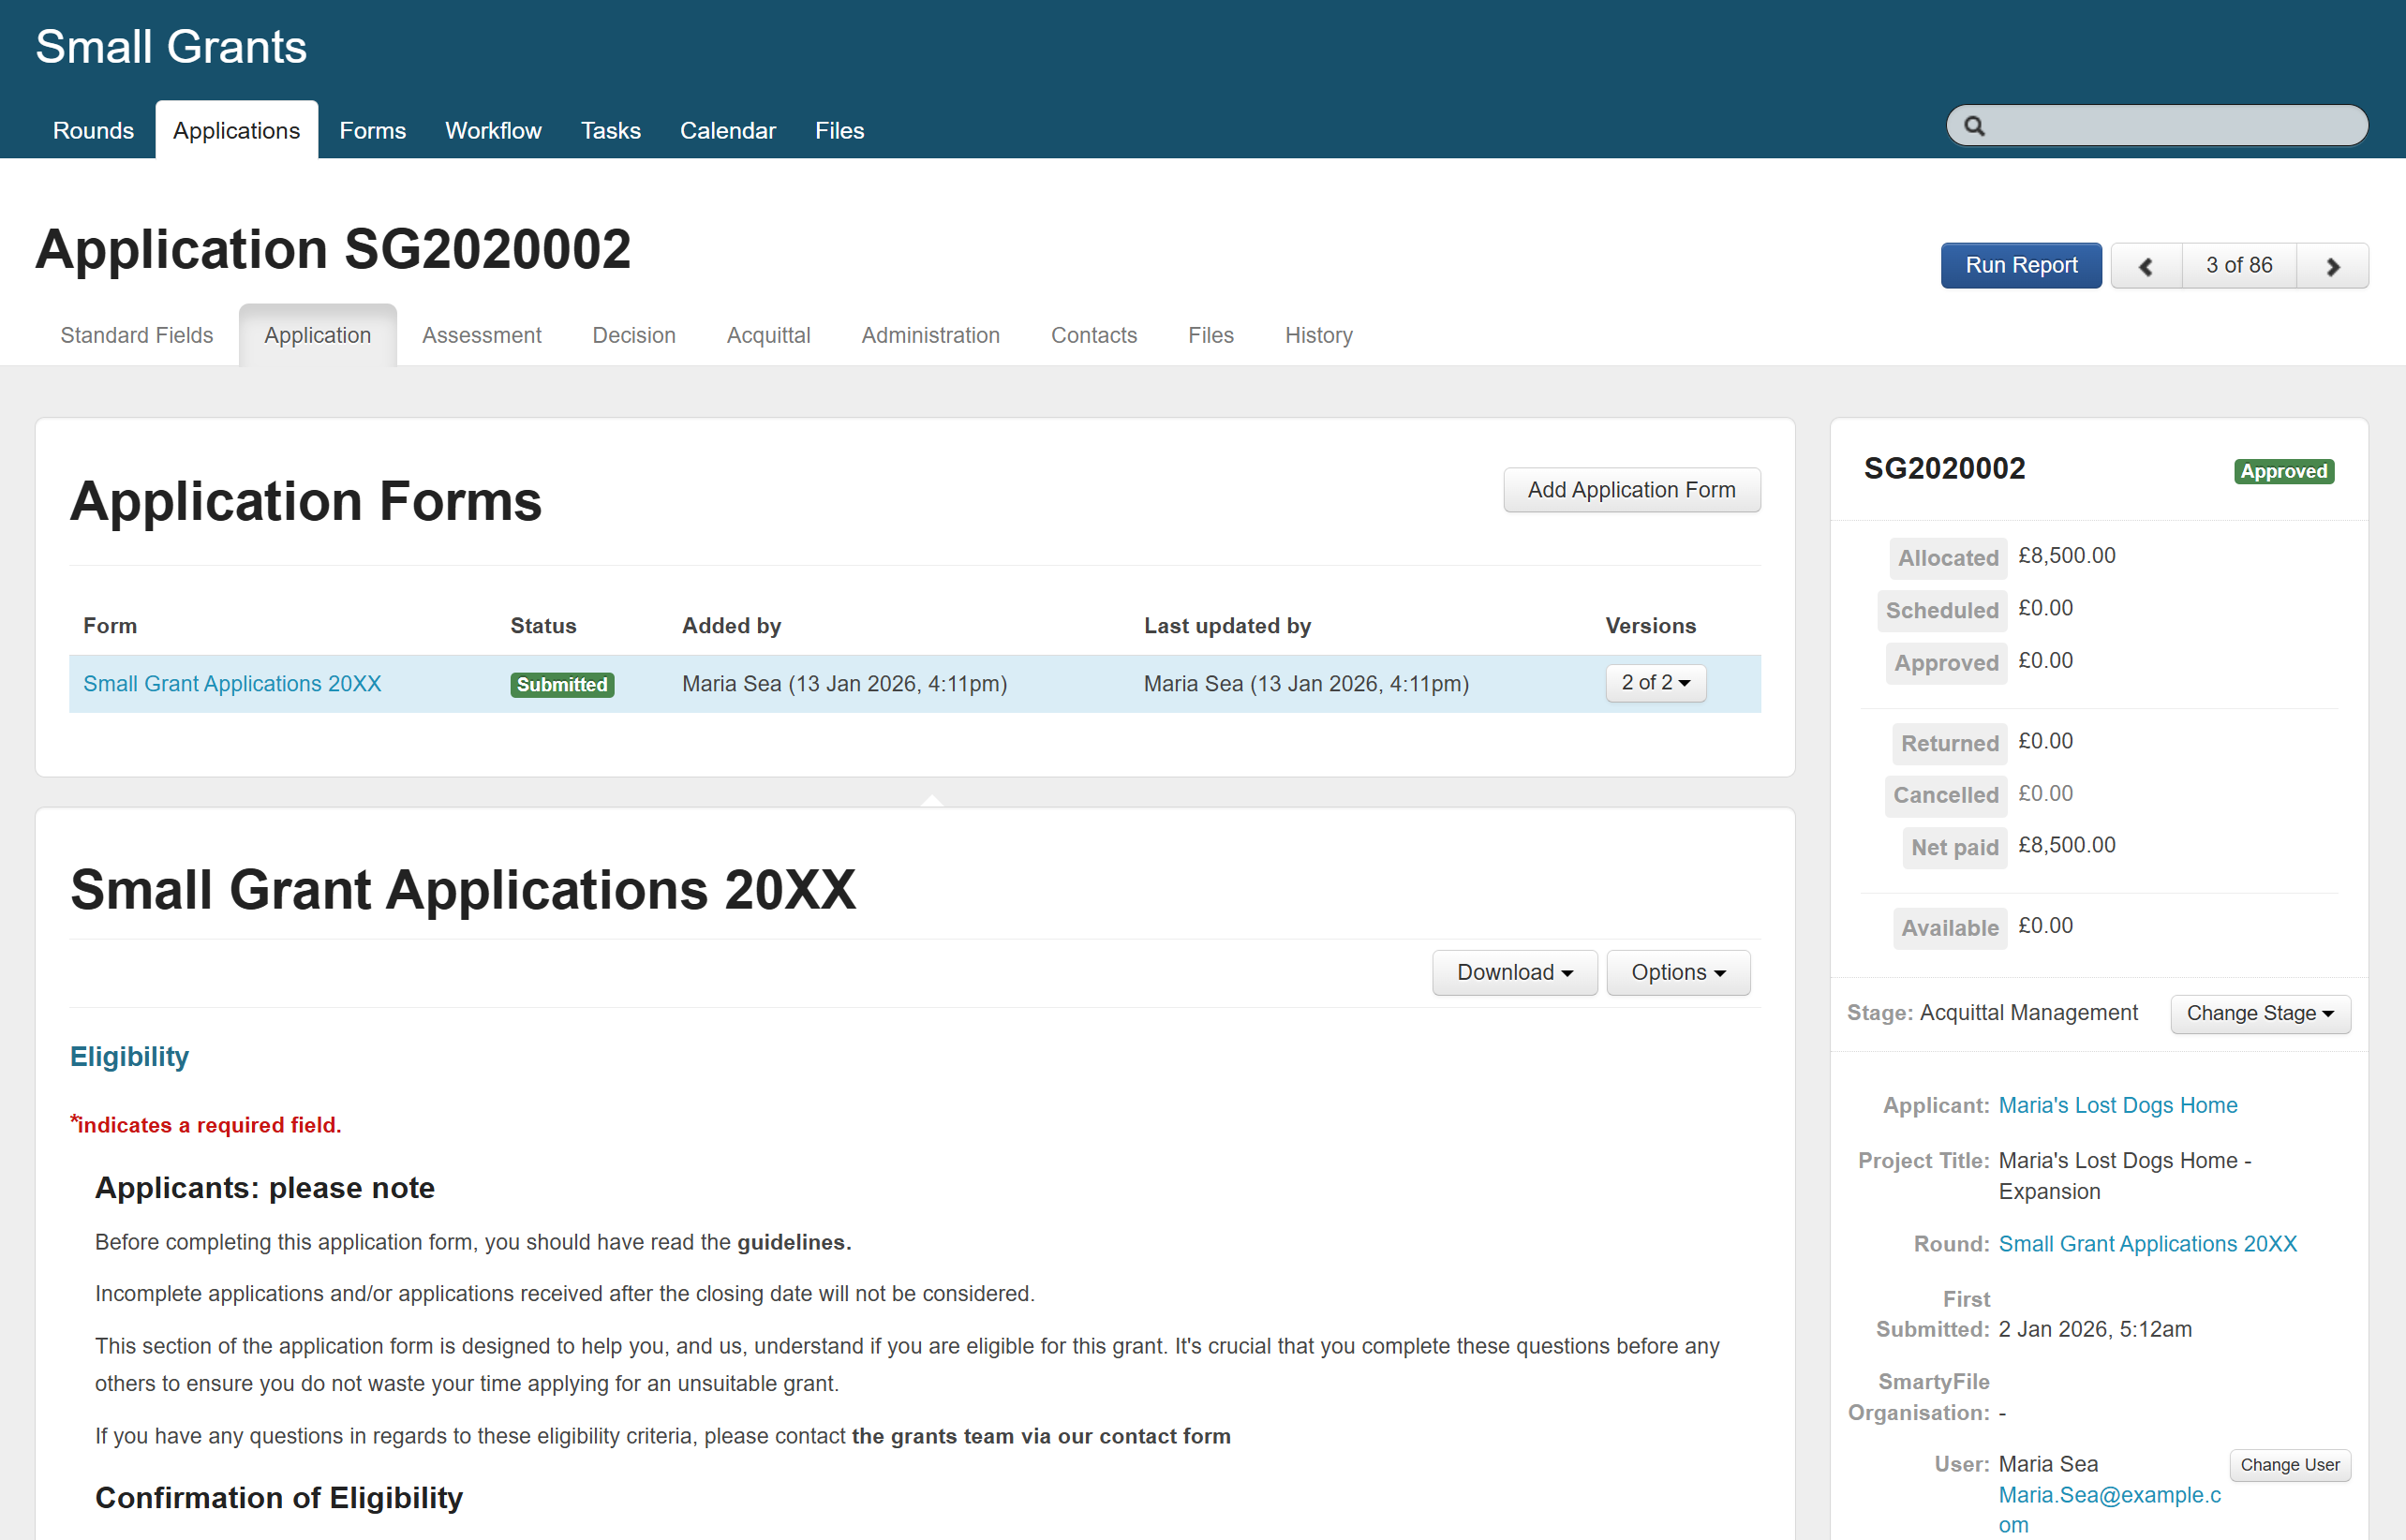
Managing day-to-day applications in SmartyGrants involves many components. Applications are the backbone of any funding program and the core source of data in SmartyGrants.
As next steps, please complete the four courses below (≈ 1 hour and 10 minutes). These have been selected to help you navigate and use application records effectively. Once all courses have been completed, head to Sending emails.
Submitted applications | |
Managing submitted applications and variations (≈ 30 minutes) |  |
Filtering | |
Filtering application records (≈ 15 minutes) | |
Bulk actions | |
Bulk action applications (≈ 20 minutes) | |
Late and hard copy submissions | |
Late submissions and hard copy applications (≈ 5 minutes) | |
Sending emails
In SmartyGrants, users with the Standard User access level or higher can send an individual email to a contact linked to a specific application through the Send Email function.
This function can be found from the Contacts tab on an application record.
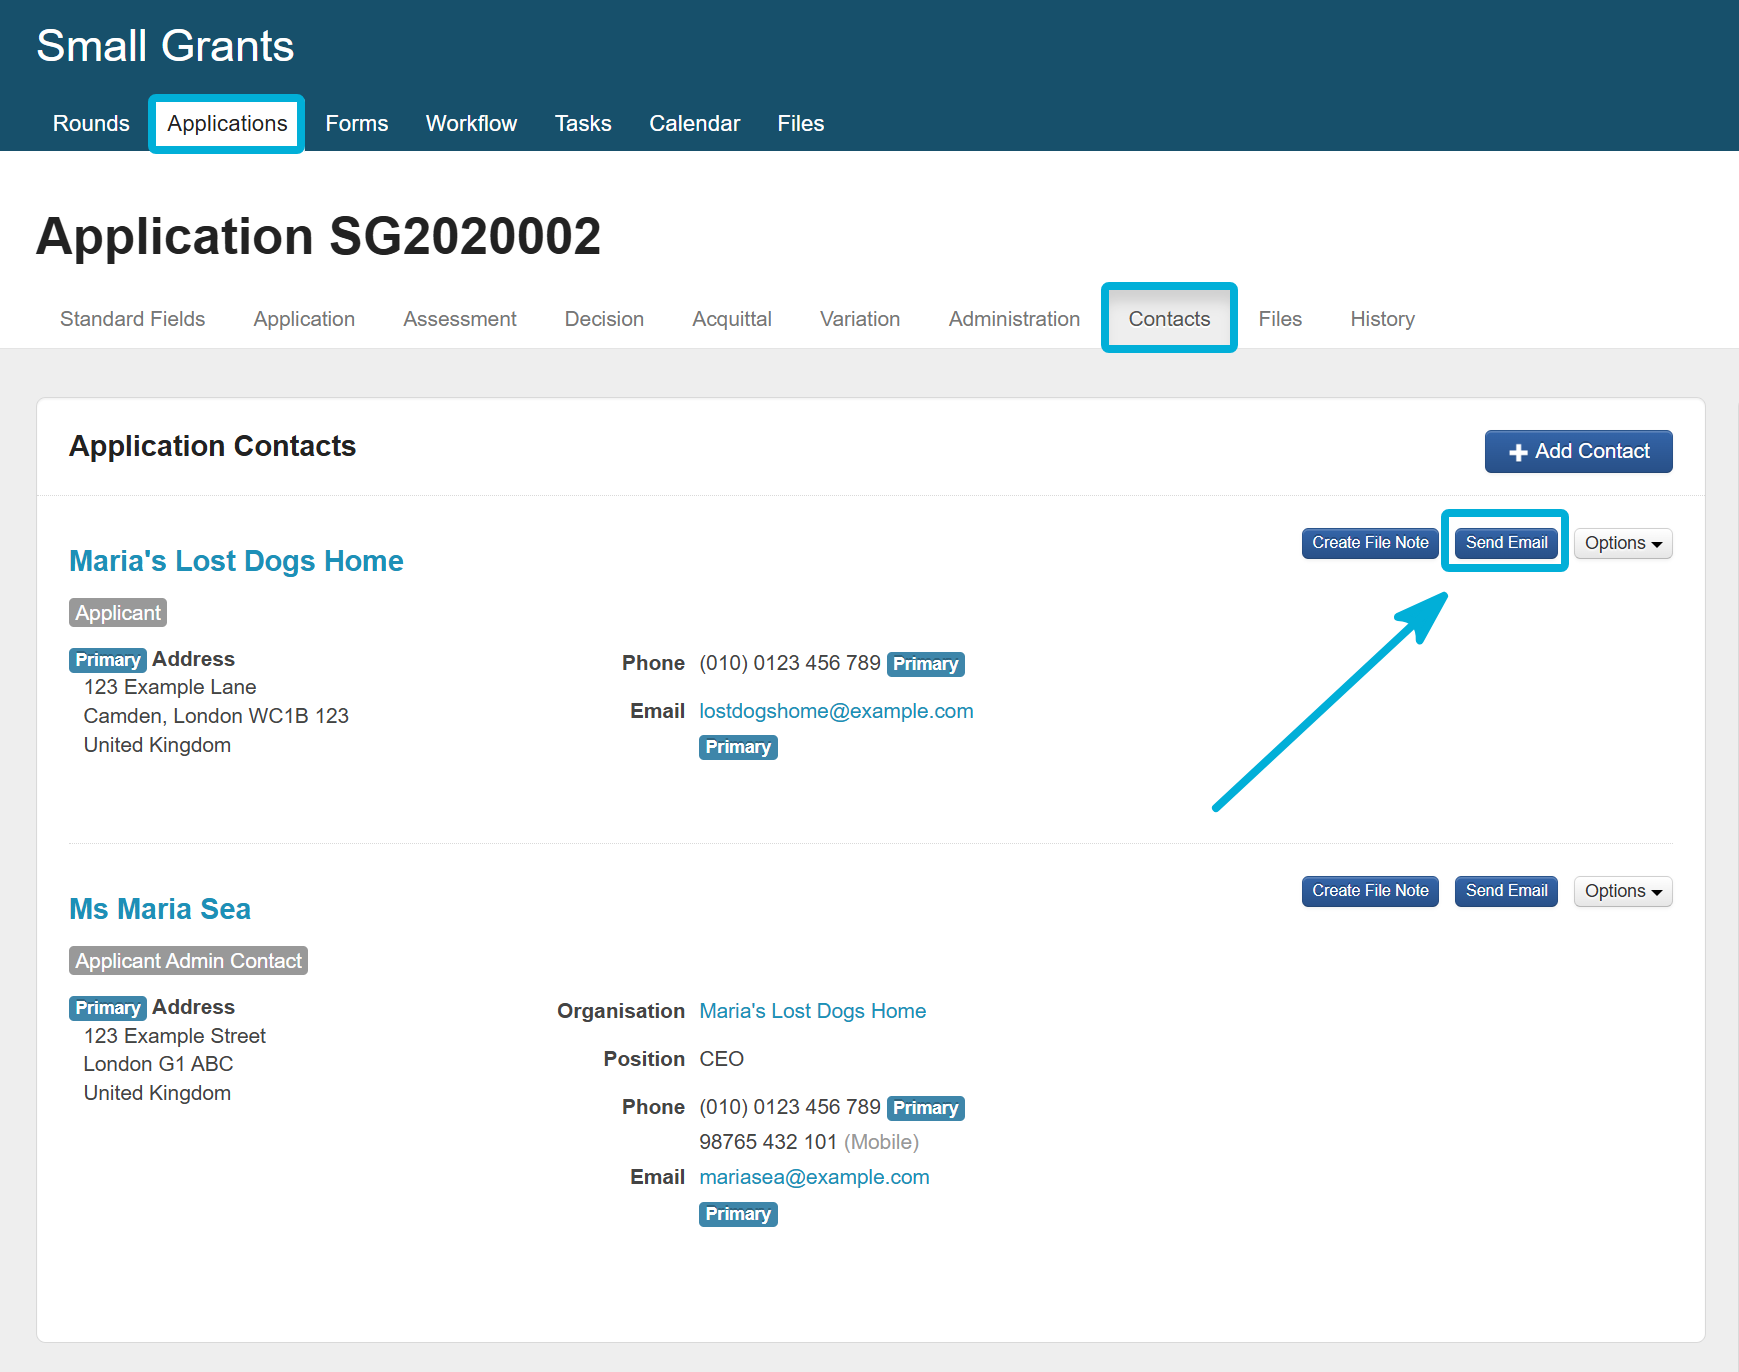
This section will only cover how to send an email to a contact (or multiple contacts) specifically associated with a single application.
Bulk emails – through Mailouts – are tackled in the upcoming training path “Assess and Decide”. This function is only available to administrator-level users by default.
Step 1 – Compose email
After selecting Send Email, the Compose Email screen will open.
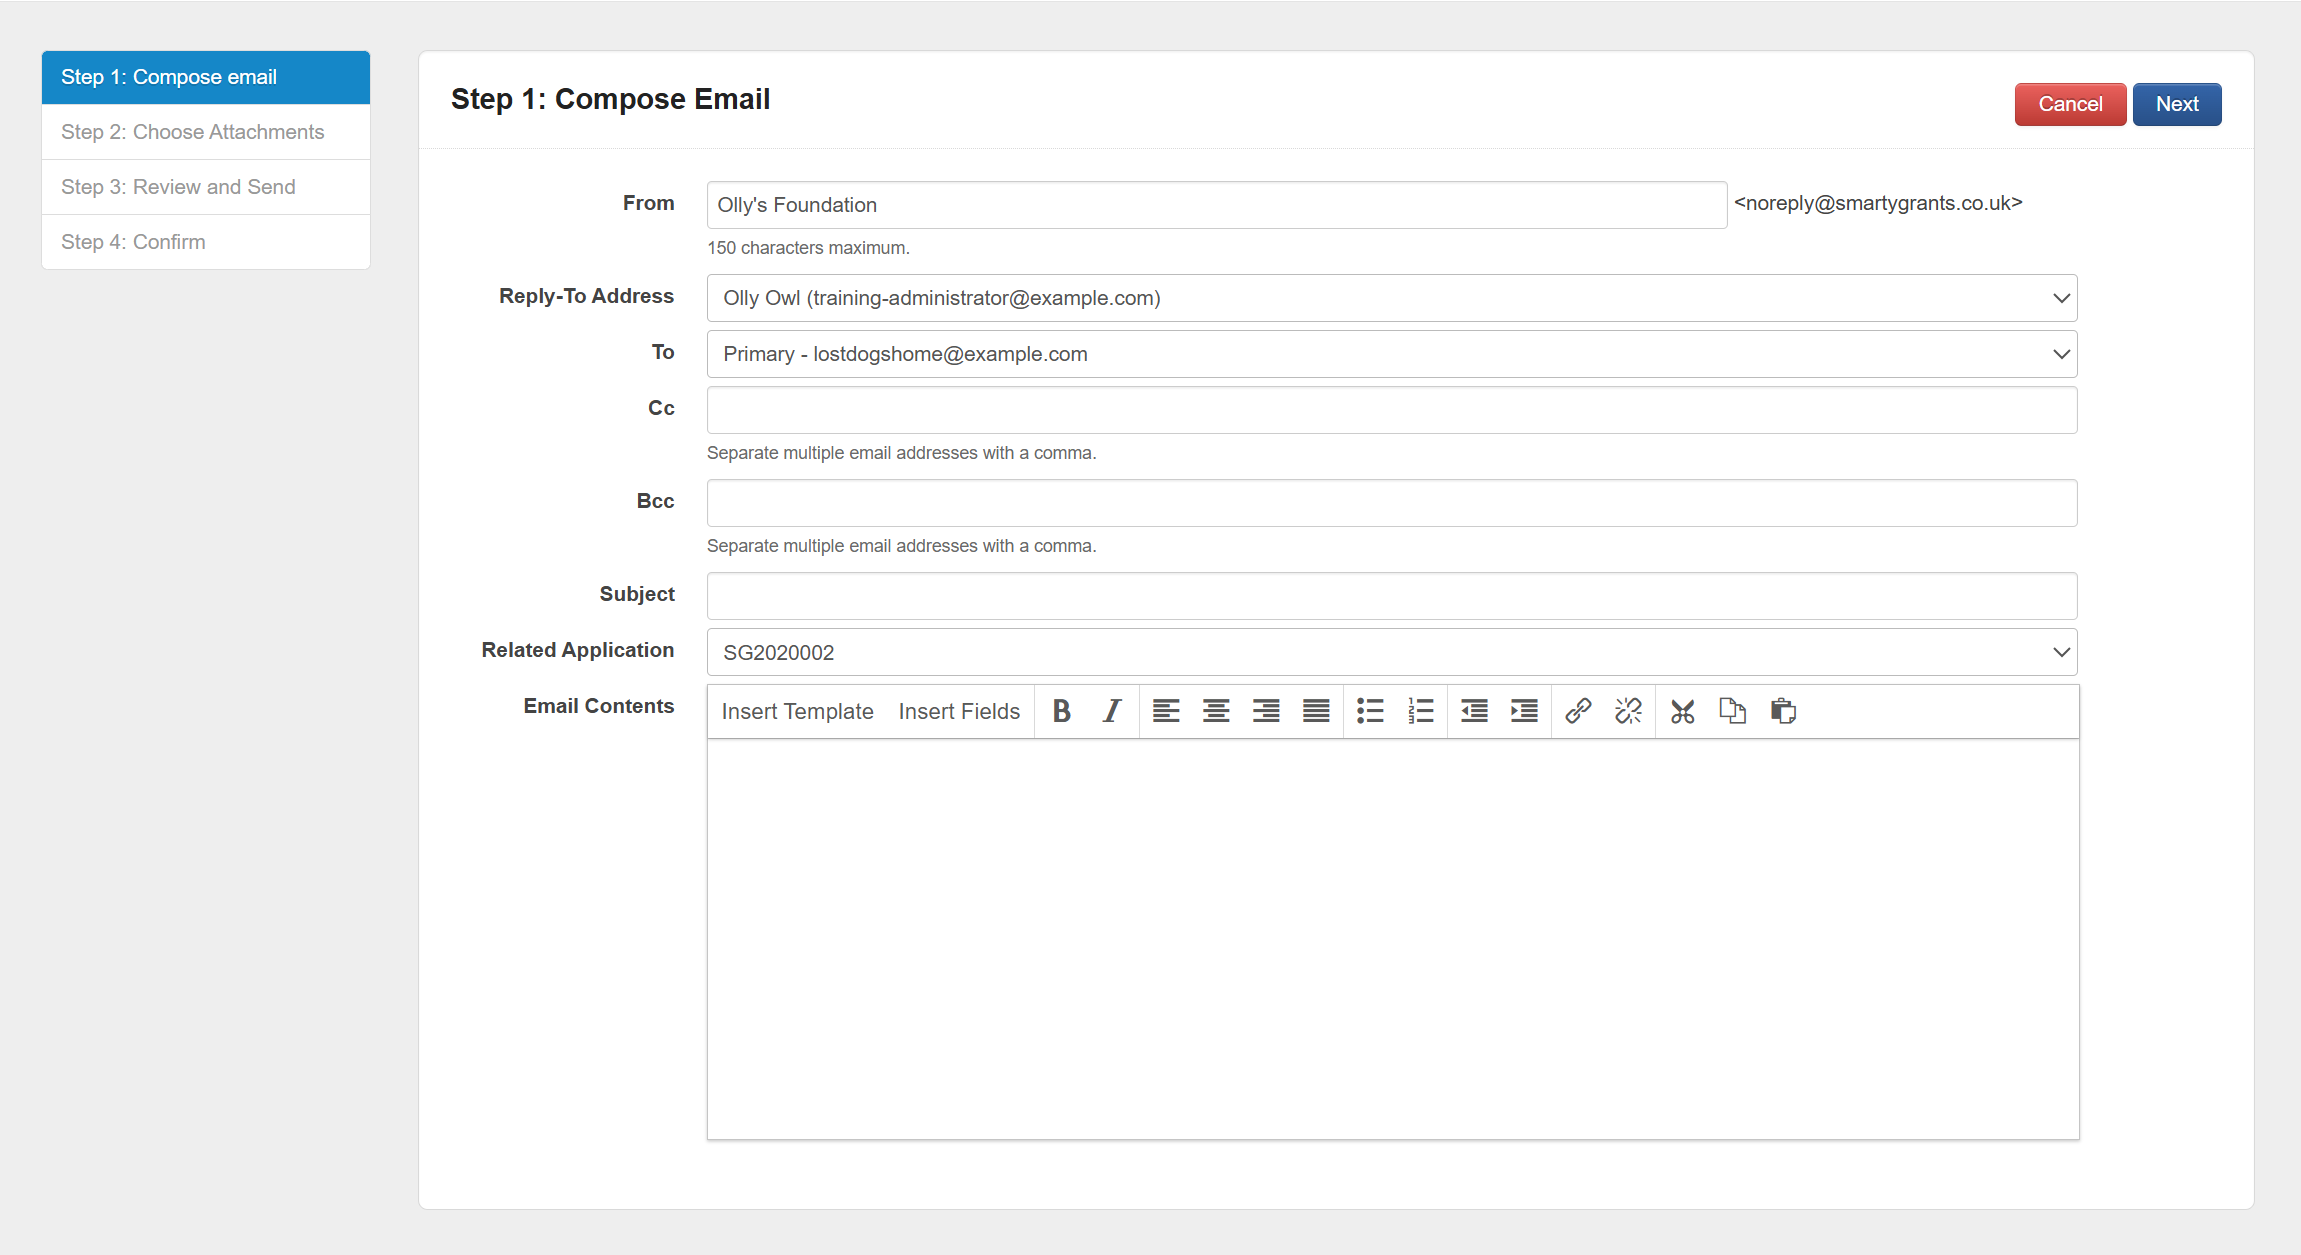
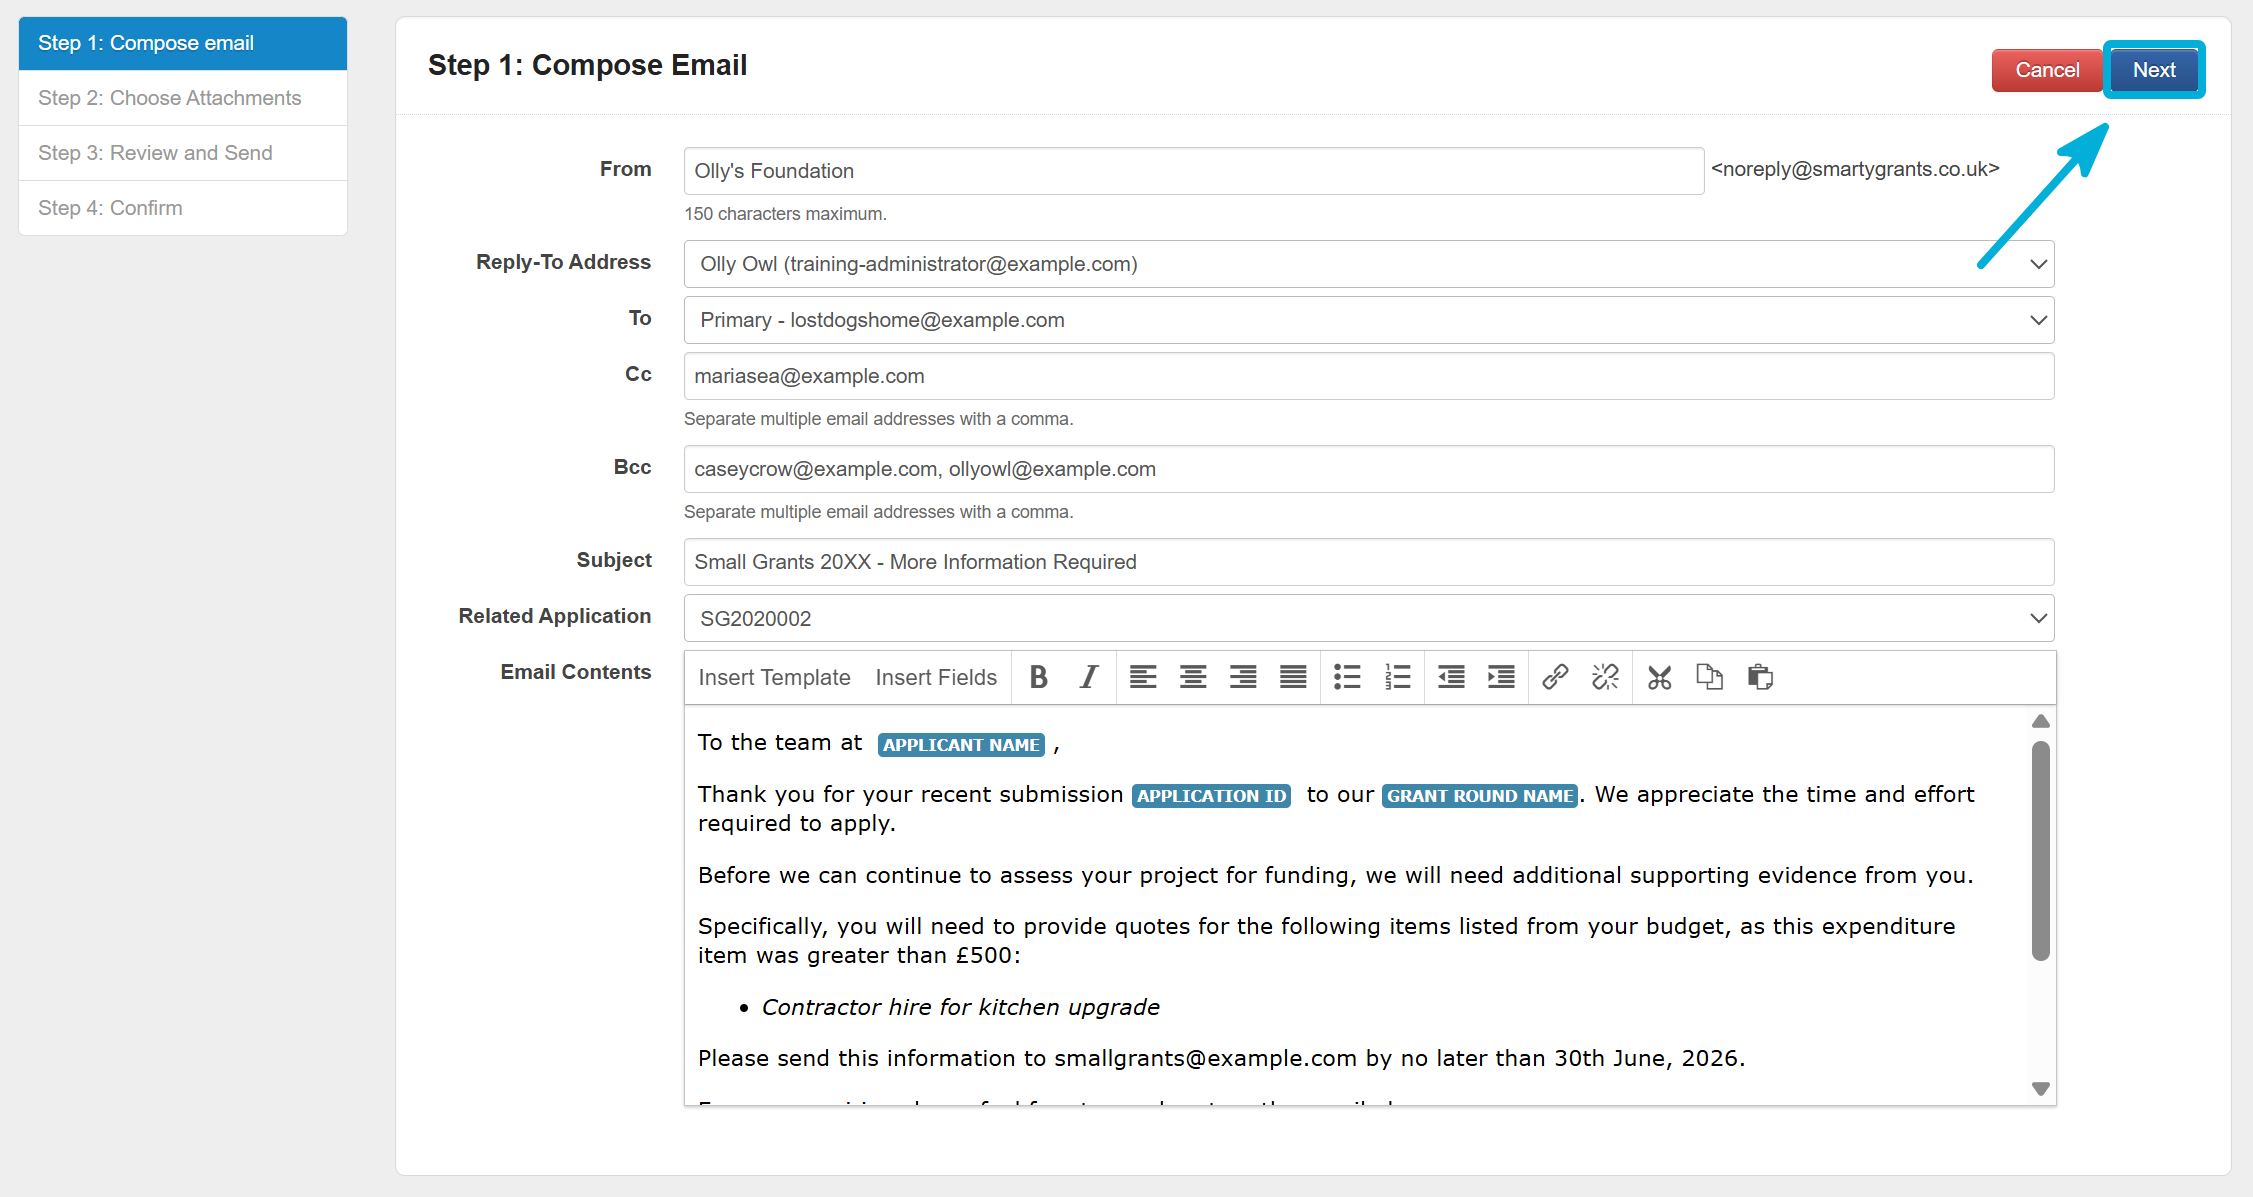
The fields described below will allow you to build your email.
From
The From field controls what shows as the sender of the email in the recipient’s inbox. By default, this will use the name of your SmartyGrants account when sending the email. From details can be modified to display text as desired.

Reply-To Address
The Reply-To Address will default to the username (email address) of the user who is logged in and sending the email.
To edit, from the dropdown, select the required Reply-To Address from the options available.
Note that the options displayed will only show registered users in the account.

Important: SmartyGrants does not handle inbound emails – only outbound ones.
If a recipient replies to an email, the reply goes to the Reply-To Address email set here. Note that all individual emails are sent from noreply@smartygrants.co.uk.
Recipients only see the Reply-To Address if they reply. Upon initiating the reply, the Reply-To Address then replaces the sender in the To field.
To
The To field is the recipient of the email.
To edit, from the dropdown, select the To recipient from the options available.
Note that the options displayed will be all available email addresses for all contacts linked to the application.

Tip: While you can only select one contact as the To recipient, you can have as many Cc or Bcc recipients as required.
Cc & Bcc
Cc and Bcc are additional recipients of the email. Bcc recipients are not visible to other recipients.
Select the Cc or Bcc field to manually enter the email address of any required Cc or Bcc recipient(s). Note that for multiple email addresses, these must be separated by a comma.

Subject
The Subject field allows you to prepare a subject line for the email, which will be seen in the recipient’s inbox.

Related Applications
By default, emails sent from the application record will automatically populate with the application number in the Related Application field. This establishes a connection between the email correspondence and the application record.
If the email instead relates to a different application, select the relevant Application ID from the Related Application dropdown.

Tip: In most cases, you should avoid changing the default Related Application option.
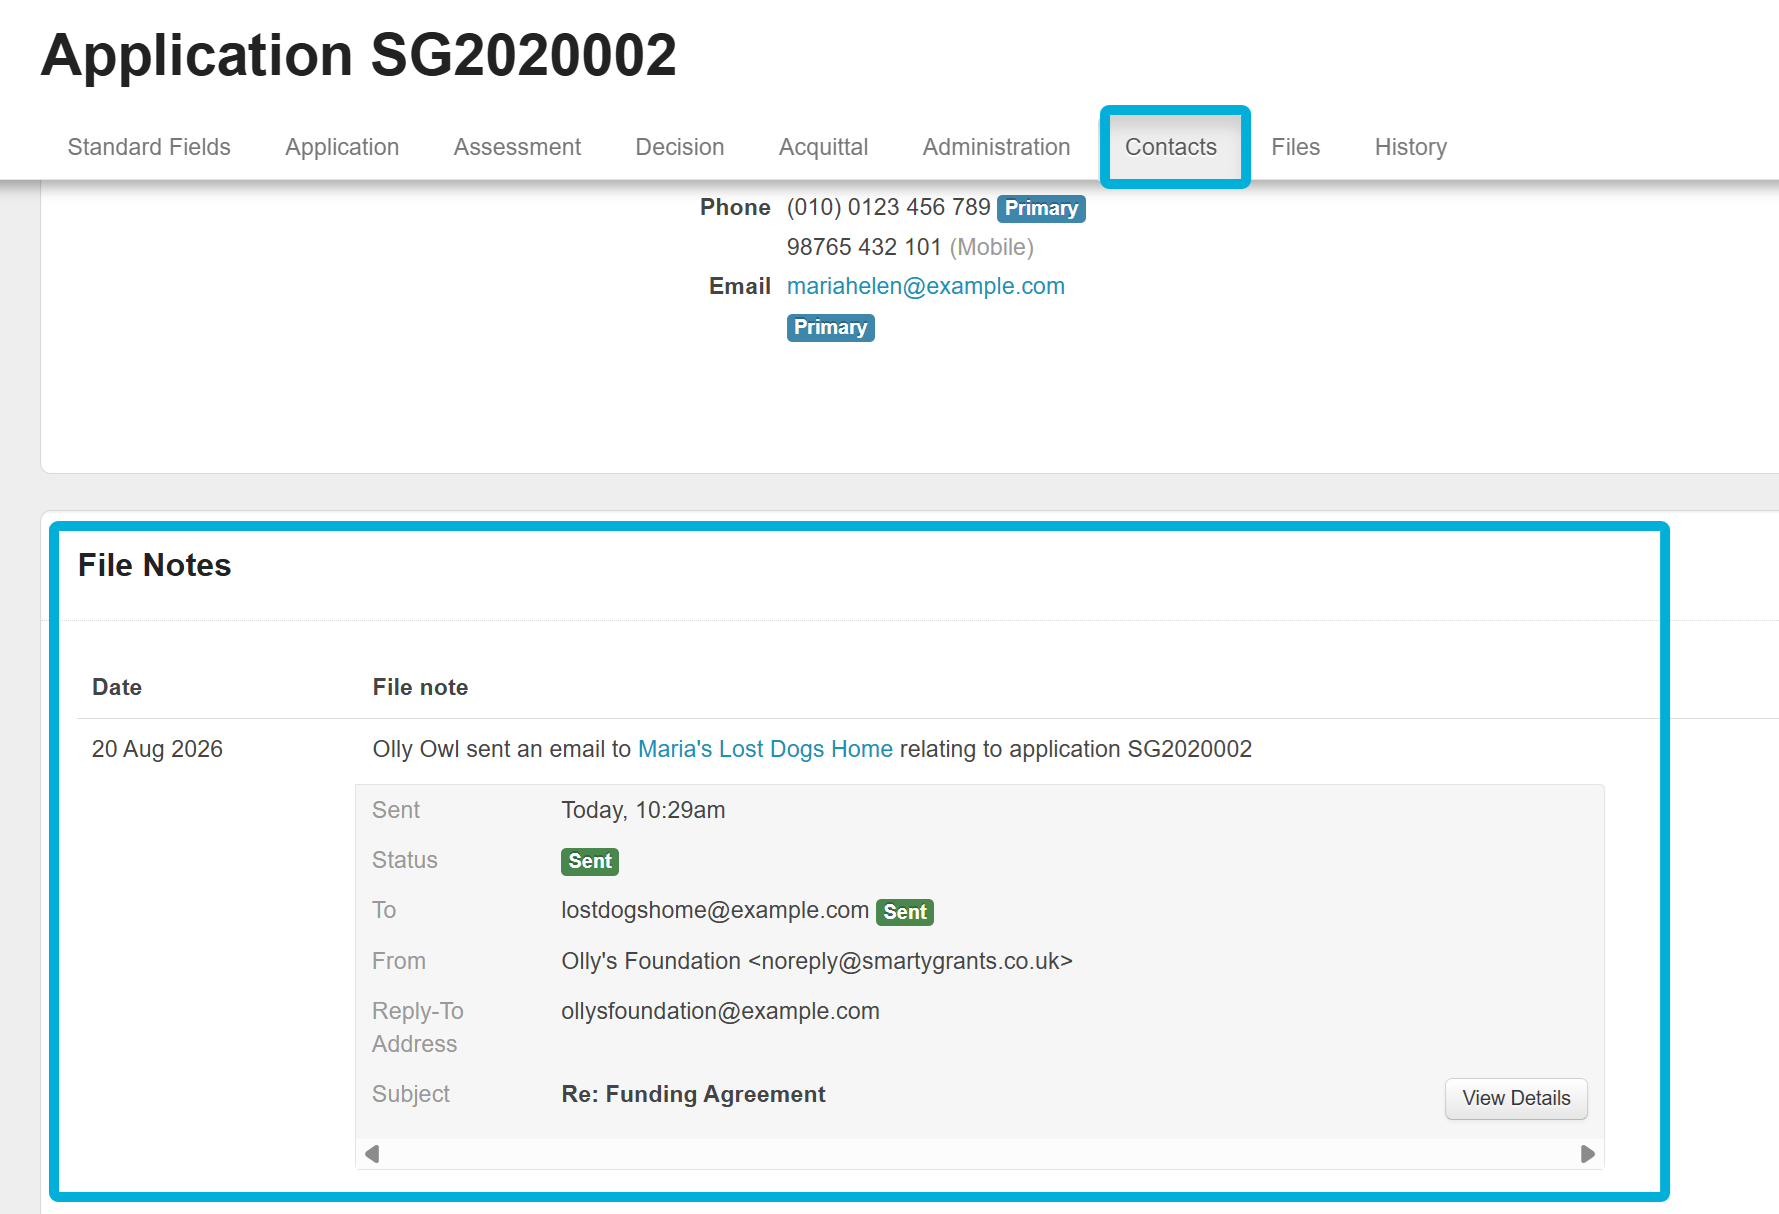
Relating an application ensures the email appears in the Contacts tab within the application, under File Notes.
This will help to avoid confusion when viewing email history for the contact from the Contacts Directory (Administrators only). This is especially useful as a single contact could be associated with multiple applications in across multiple programs.
Email Contents
The Email Contents field is the body of your email. Select the canvas area to begin composing.
In addition to entering text, you can:
Use basic formatting and styling, available from the toolbar.
Use a template by selecting the Insert Template button on the toolbar.
Use insert fields by selecting the Insert Fields button on the toolbar.

Insert Template
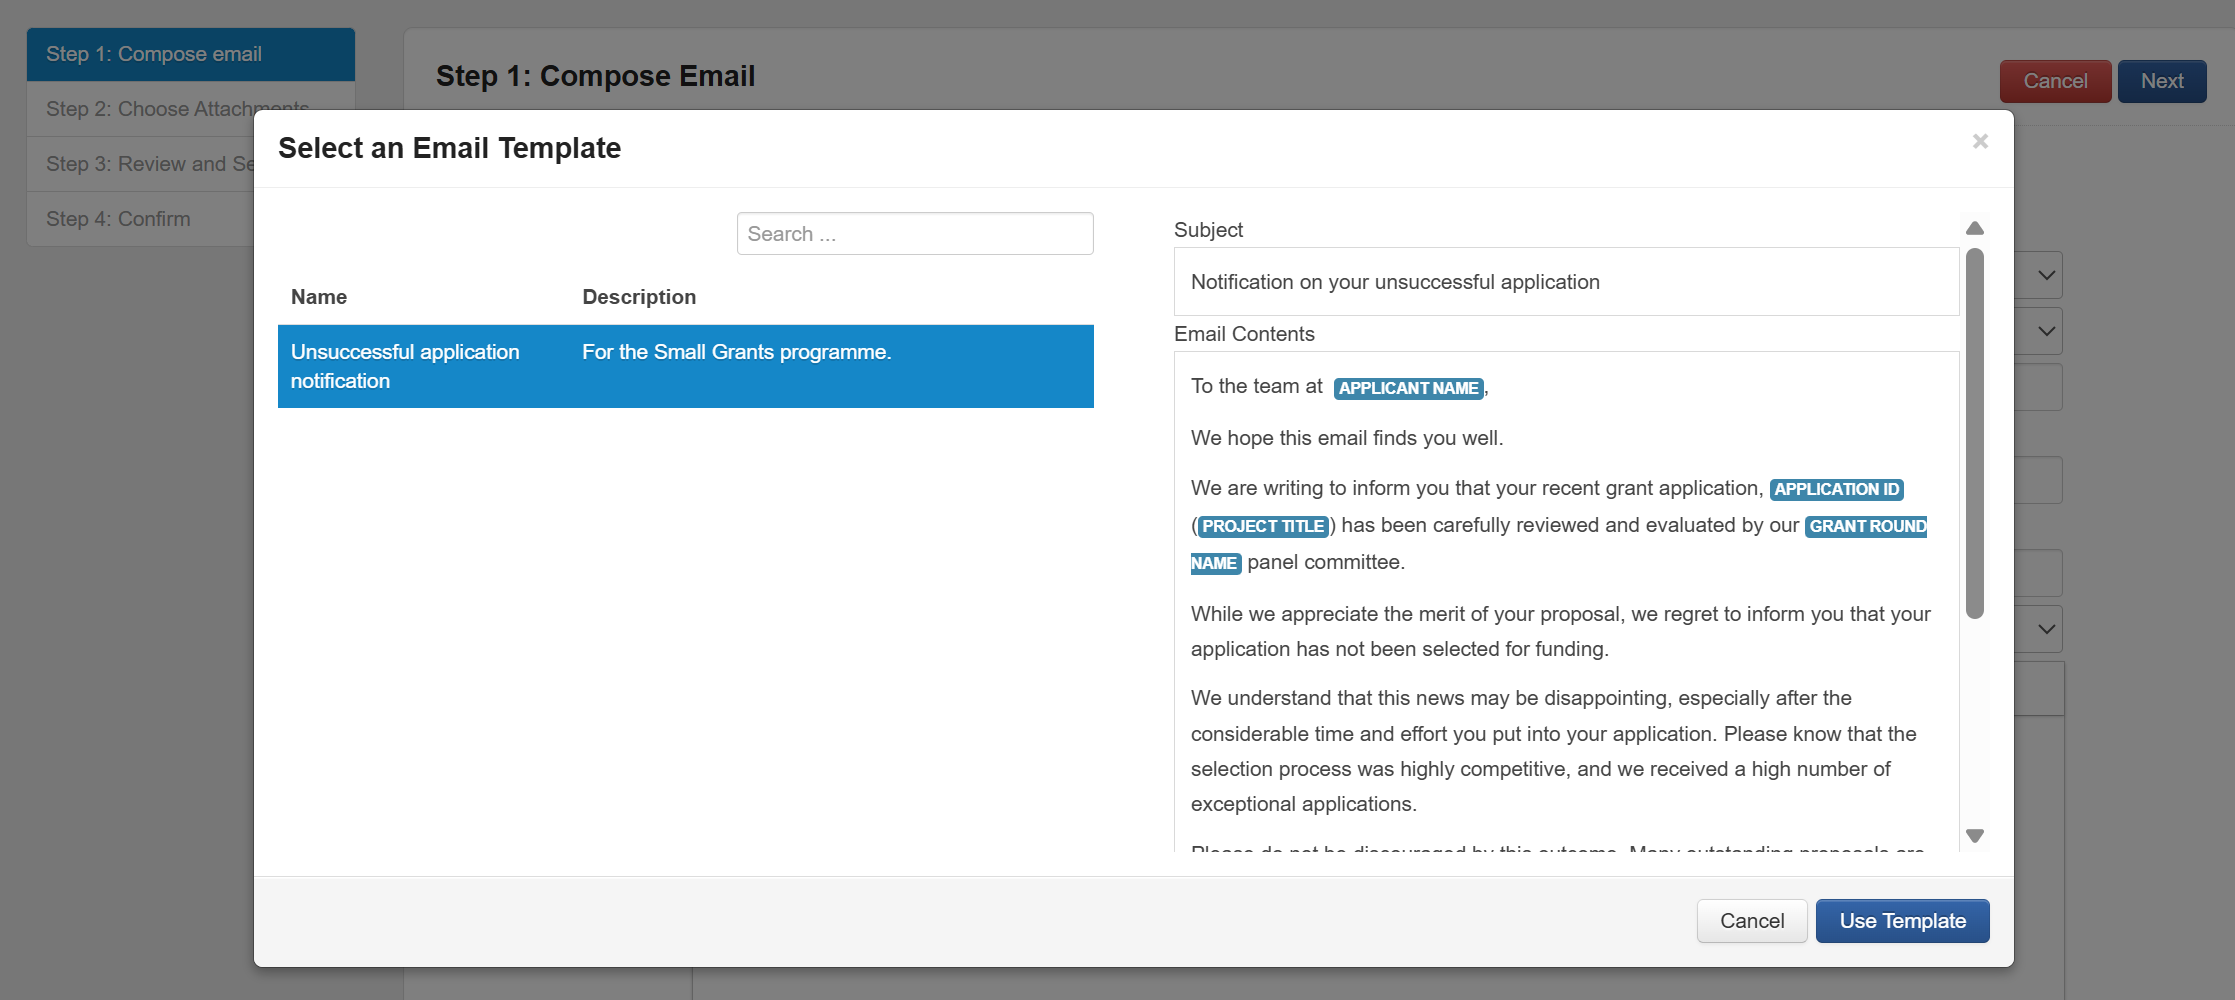
Email Templates allow you to fill the contents of an email from a pre-formatted template. This can be helpful for sending any correspondence that should be communicated in a consistent way.
Email Templates are created in the Mailouts (Administrators only).
If there are templates available in your account, they will be listed after selecting the Insert Template button. Select the name of the template, then select Use Template.
Depending on the scope of your implementation, you may or may not have templates created for you. If in scope, they may not yet be set up at this stage in the process.
However, Administrators are welcome to explore creating templates using our documentation found here.
Insert fields
Insert fields are placeholders for real data, and work similarly to a traditional mail merge. When the email is sent, data from the specific contact or application record will be inserted into the email.
Using insert fields can save you a lot of time as they eliminate the need to search for, copy and then paste in data manually.
Select the Insert Fields button, then select the field you need. Standard fields and contact fields sit beside a + icon; select the + icon to access available options for these fields.
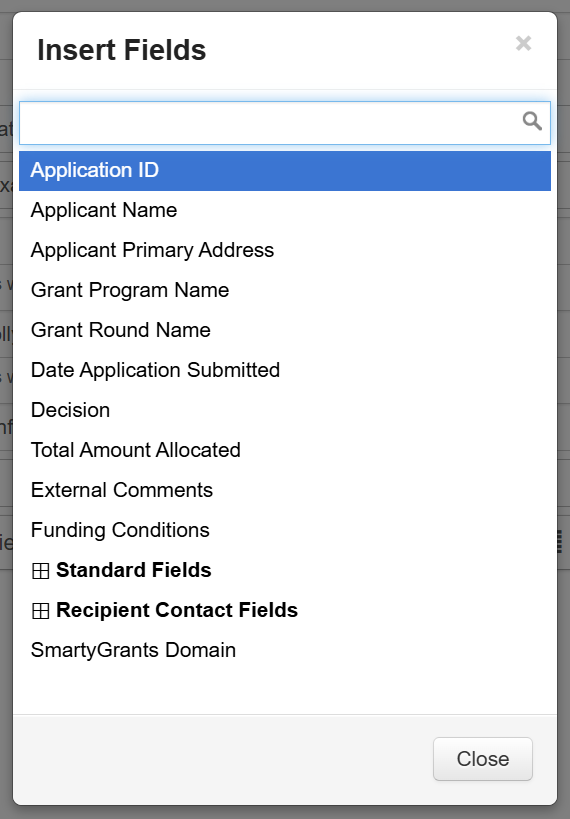
The only available insert fields are:
System-generated fields – e.g., Application ID, Round Name, Decision
Contact fields – e.g., the contact’s first name, primary phone, primary email
Standard fields – e.g., Project Title, Project Start Date, Total Amount Requested
Important: When inserting data from a field in a form, you can only use data present in standard field questions, contact field questions, and reference fields. You cannot use an insert field to pull data from non-standardised data sources (single question fields).
Once you’re done composing, select Next.
Step 2 – Choose Attachments
On this screen, you can choose to upload email attachments.
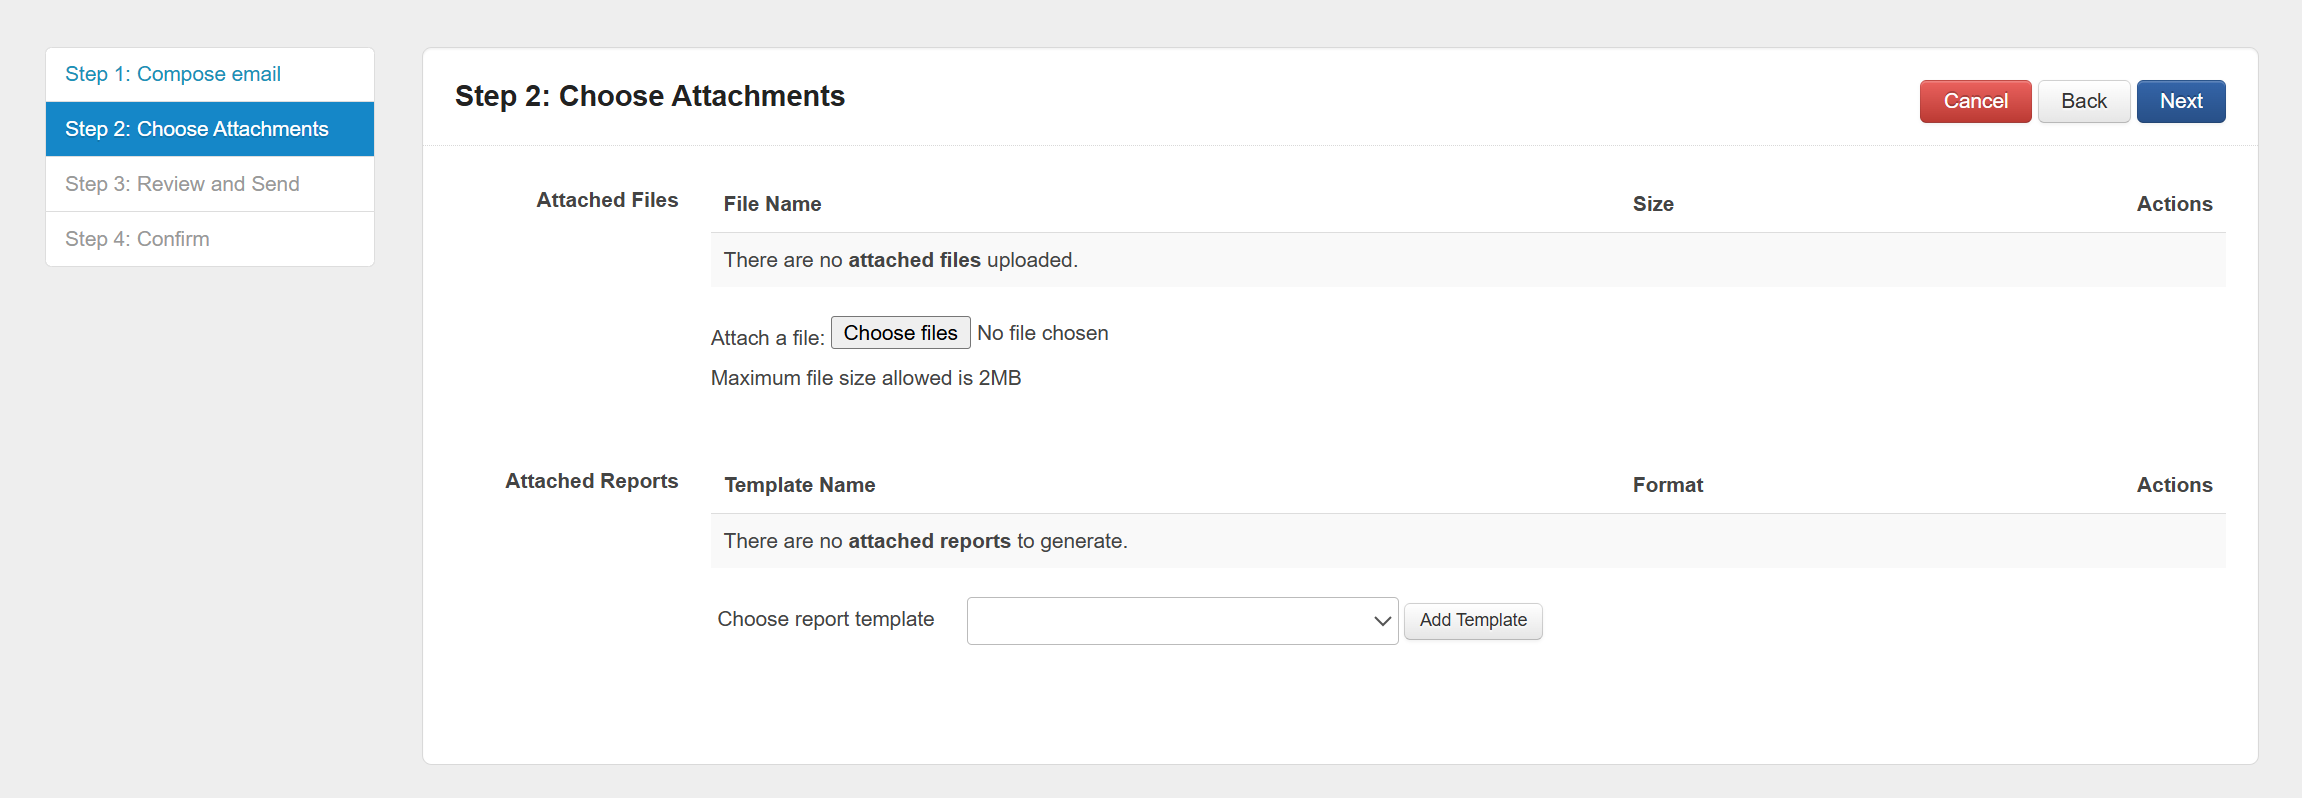
To attach a file to your email, select Choose files, and select a saved document from your device.
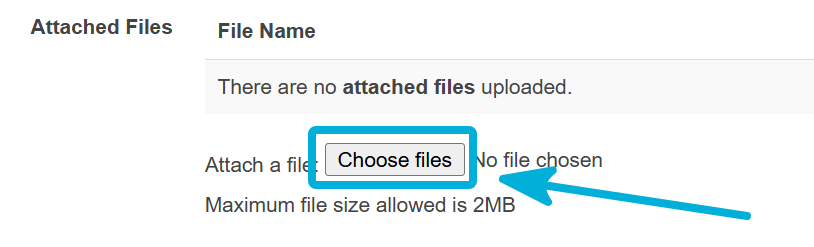
You can run a report template saved in your program and upload it as an attachment.
To do so, select the report you’d like to use from the dropdown, then select Add Template.
If a report template is selected here, the system will generate the report at the time the email is sent. A preview of the generated report can be reviewed during Step 3: Review and Send.
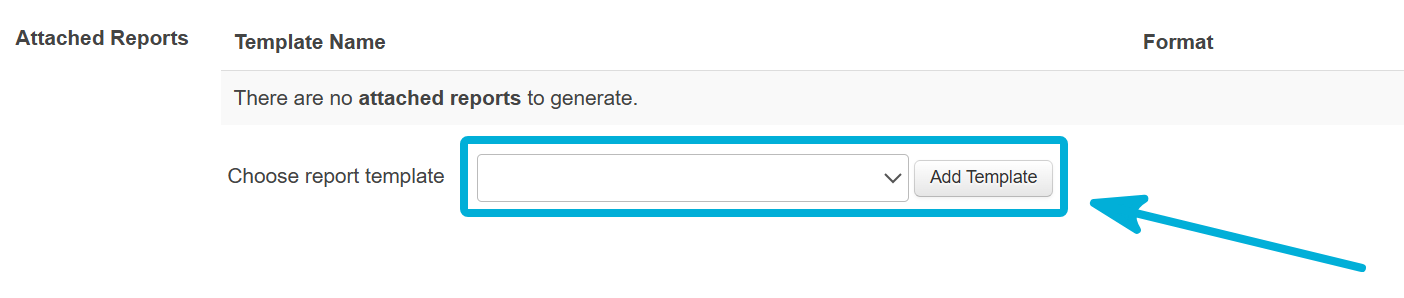
Attachments are optional. If you do not wish to add any attached files or reports, you can simply select Next.

Step 3 – Review and Send
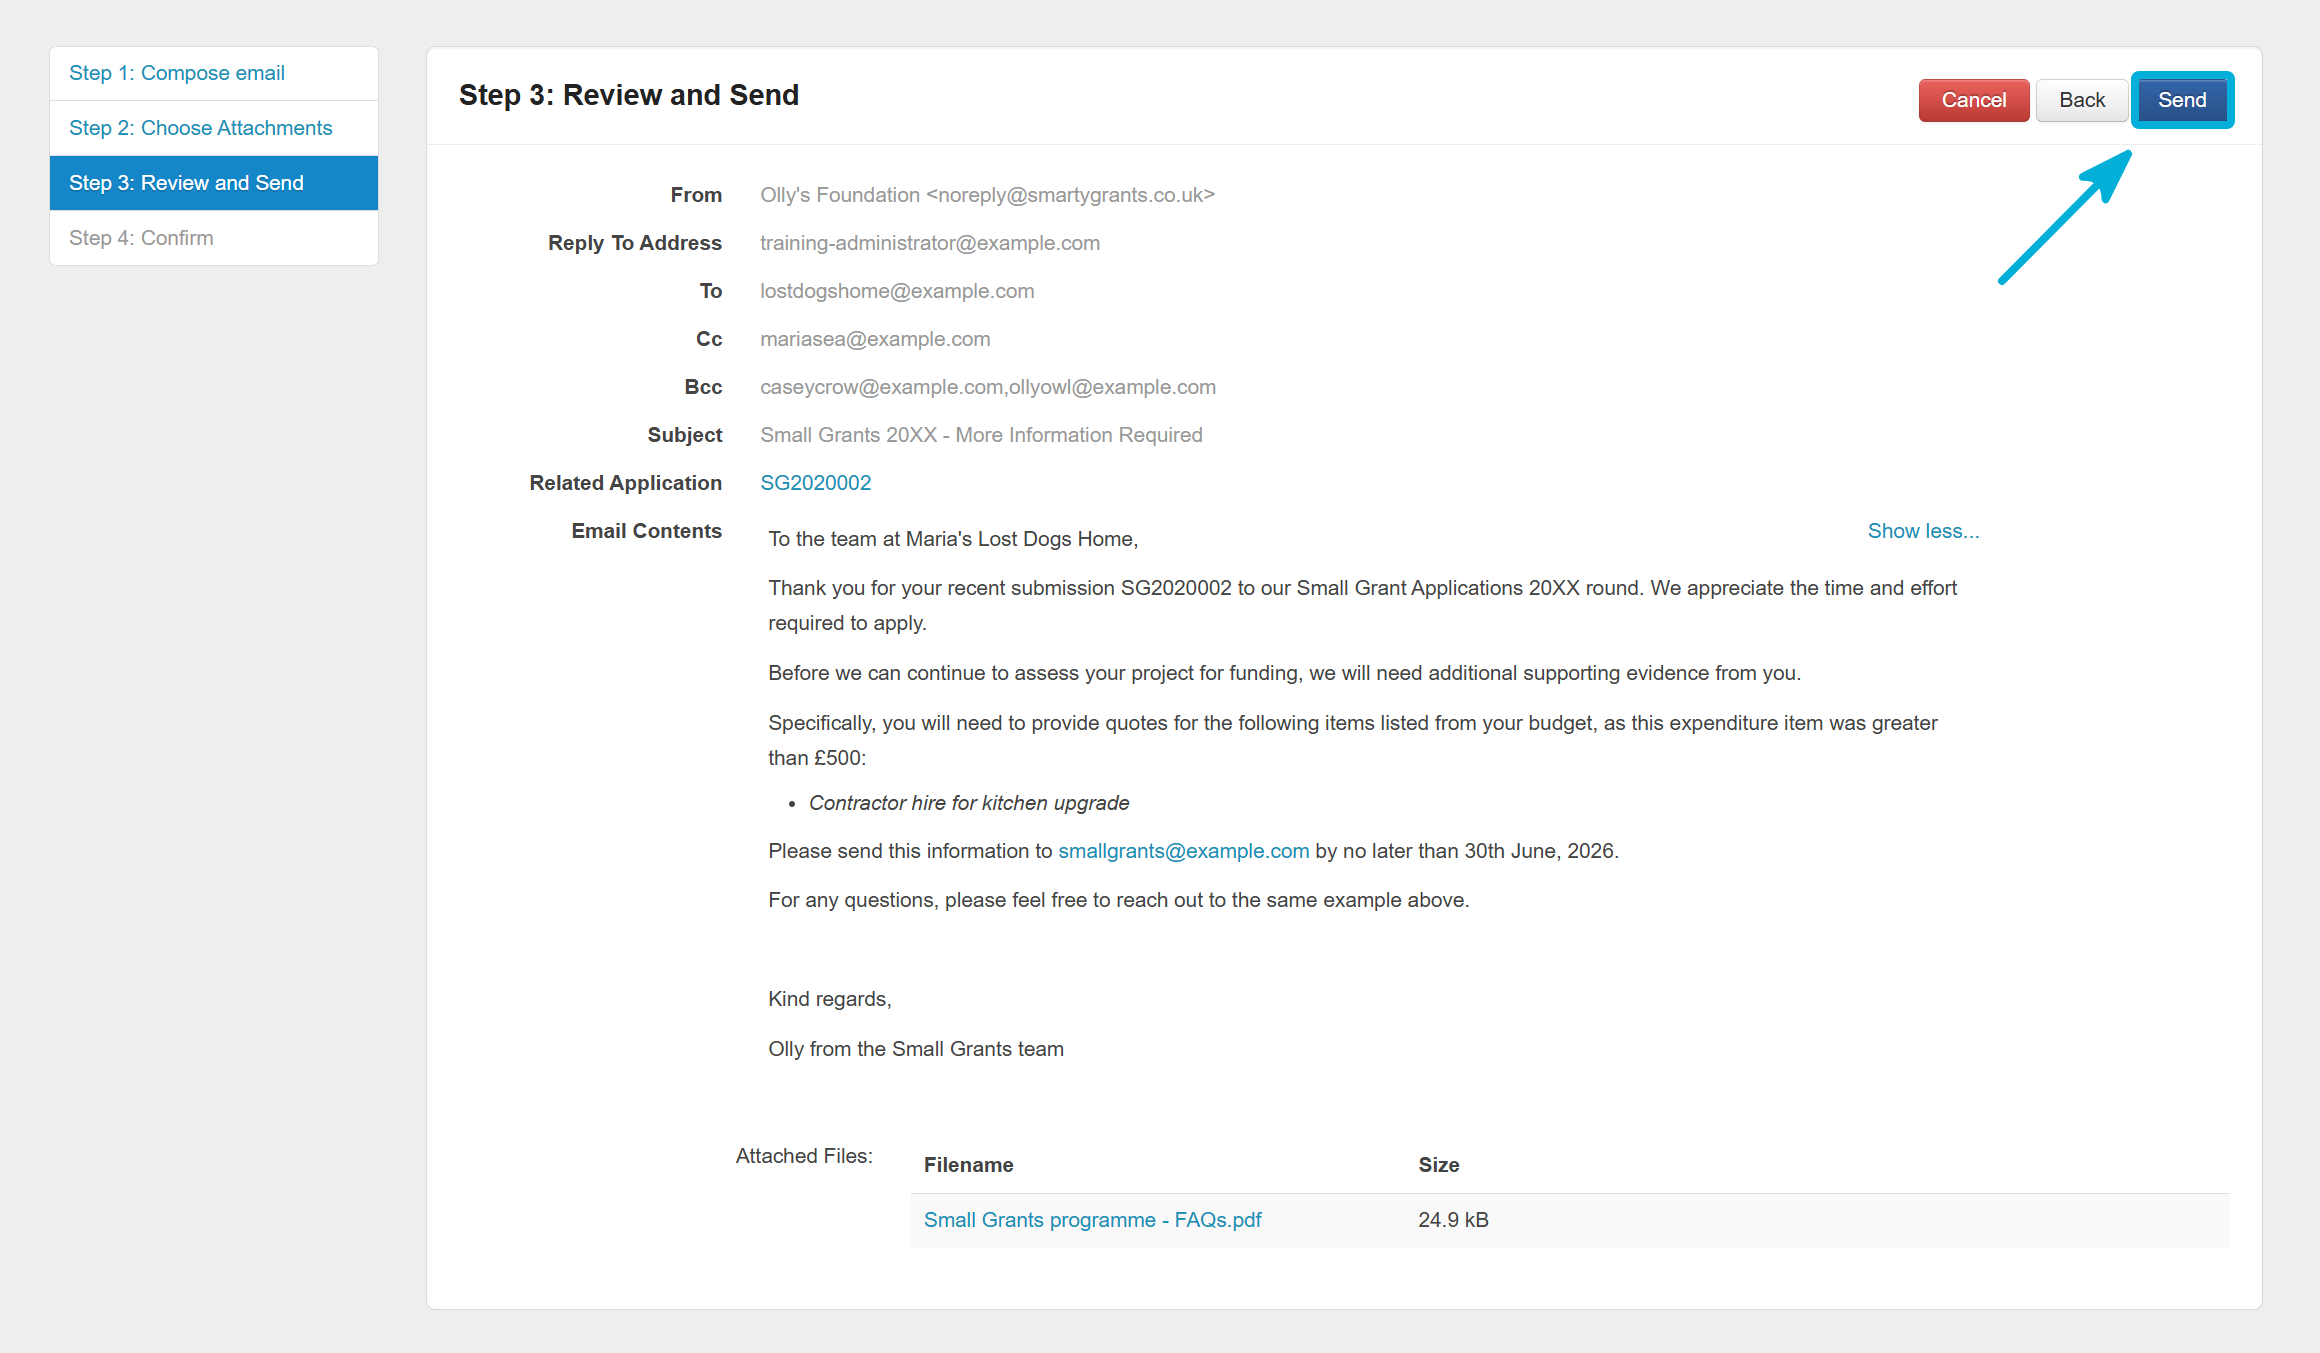
Once you have selected your recipients, composed your email, and added any attachments, the Review and Send step lets you review your drafted email before sending.
Select Back to return to the earlier steps and make any changes.
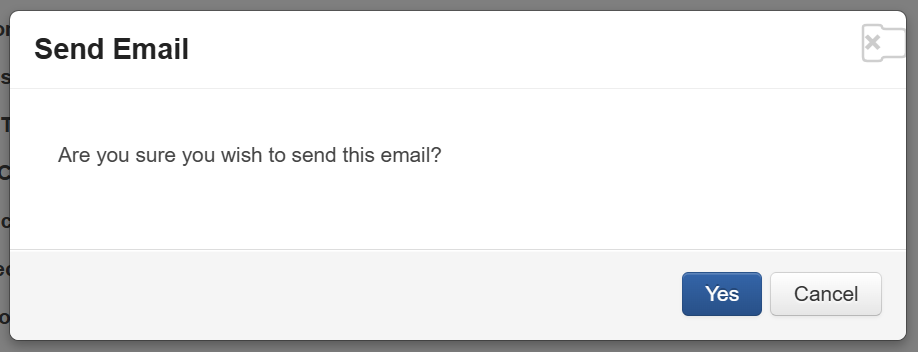
If you are happy with your email, select Send. In the pop-up window that appears, select Yes.
Warning: Once you select Send, you will not be able to cancel the process, and the email will be delivered to the selected recipient(s).
Ensure that you review email contents before selecting Send.
Step 4 – Confirmation
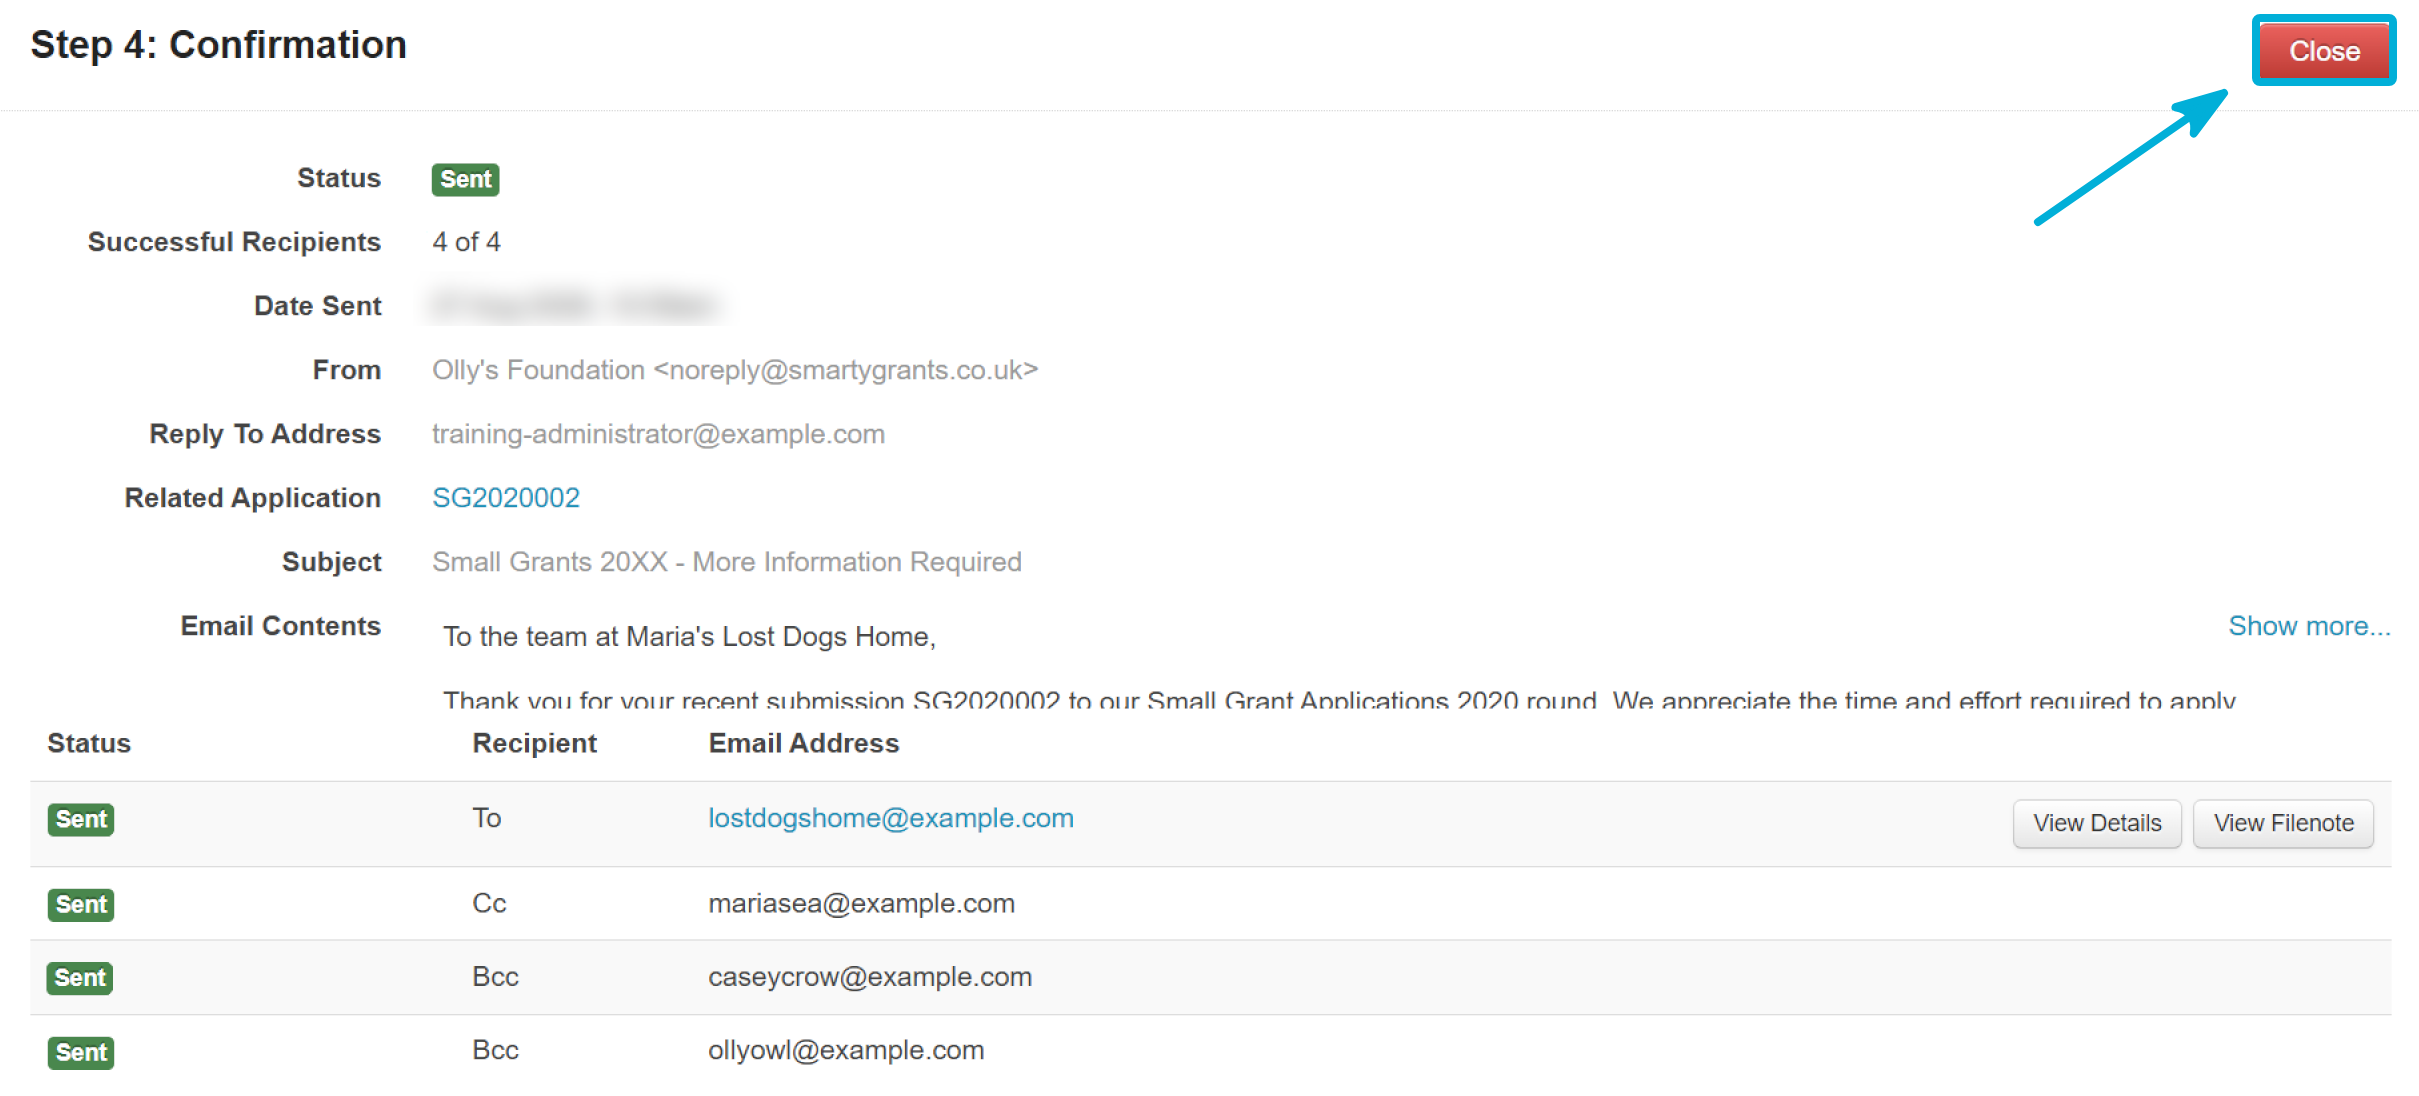
This screen shows the status of your sent email.
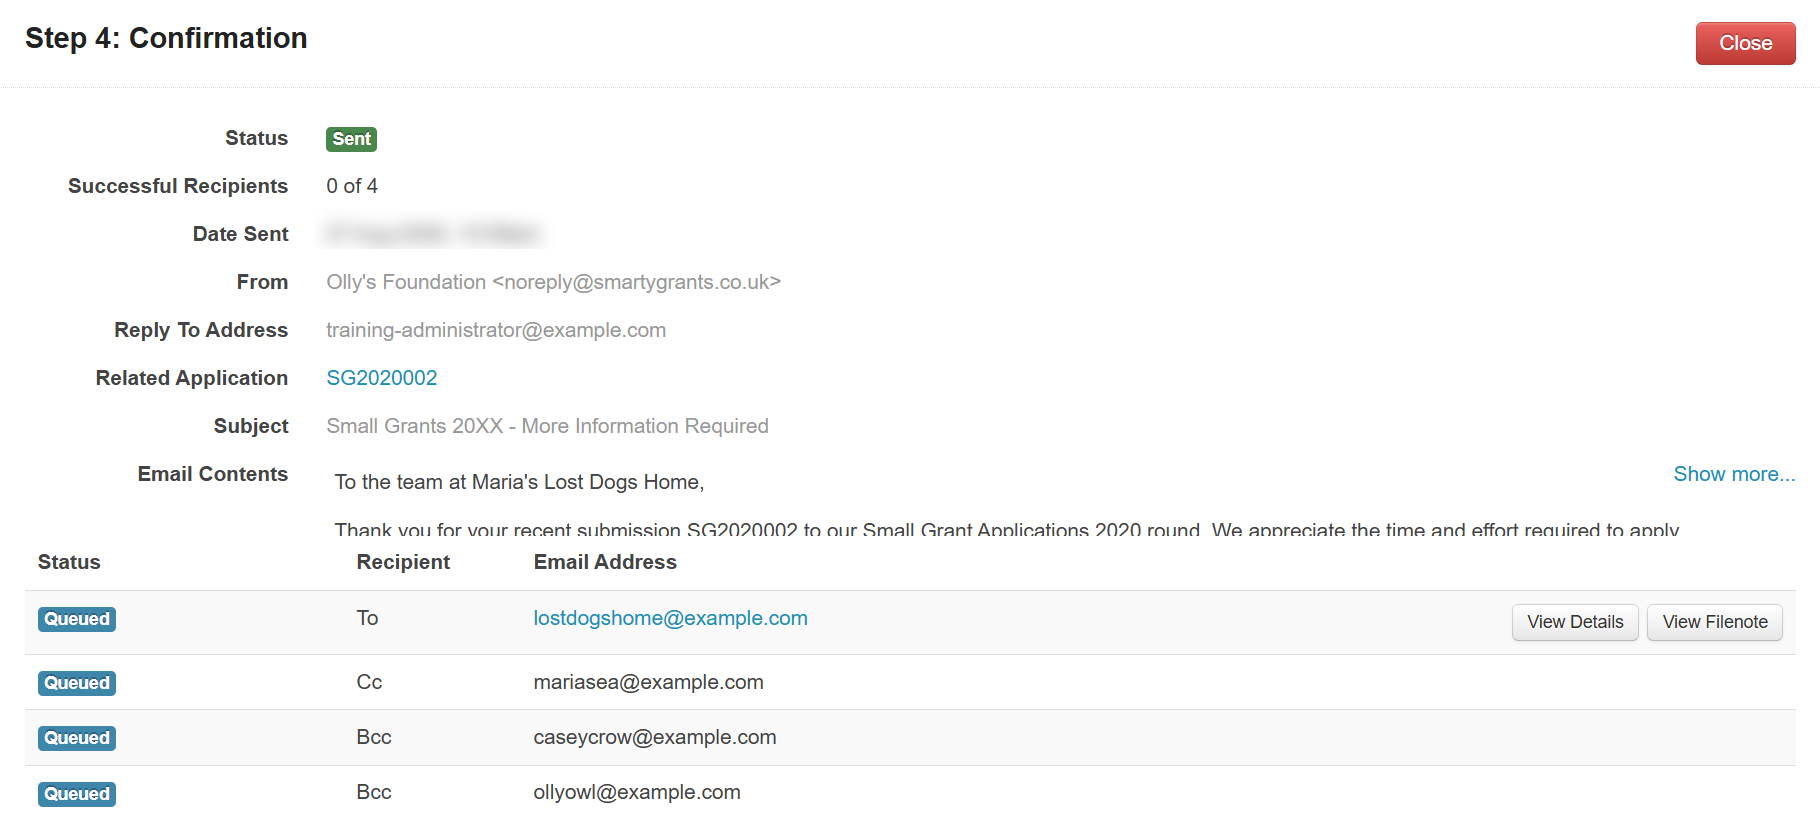
The status of the To, Cc and Bcc emails will change to Sent once the email has been successfully sent to recipients. Select the Close button to close the window.
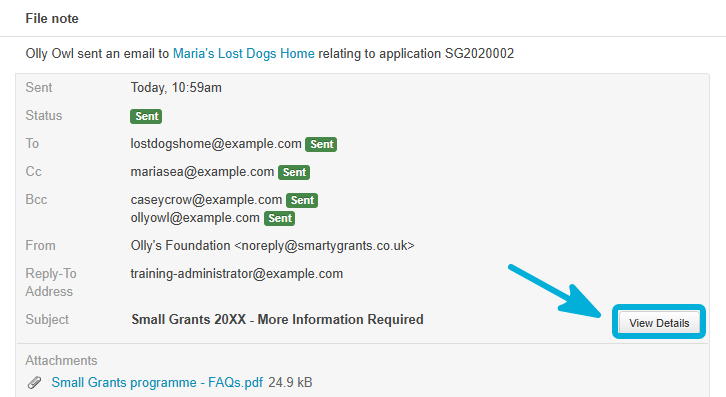
If you related the application in Step 1, SmartyGrants will keep a record of this email under File Notes on the Contacts tab of the related application record.
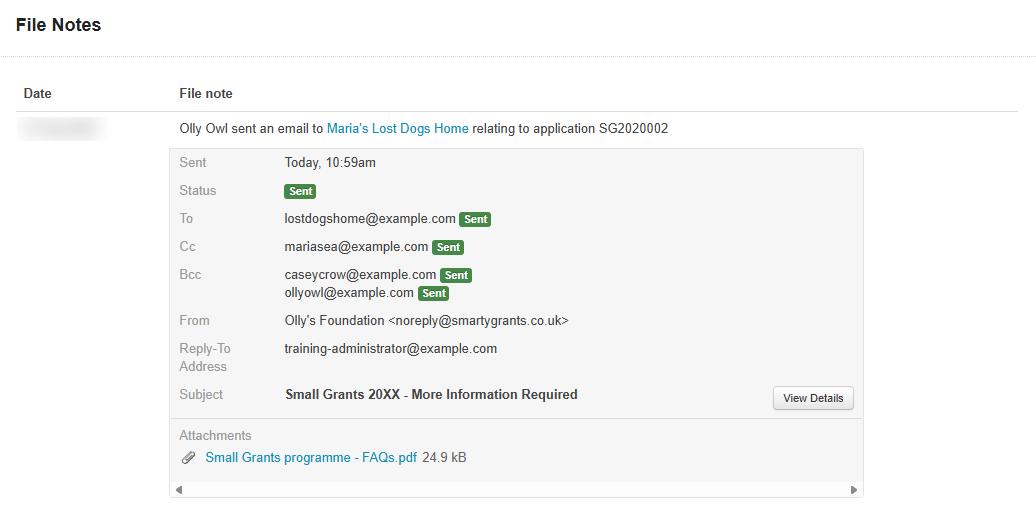
To view more information about an email mentioned in a File Note, select View Details.
Managing contacts
To understand how to manage contact cards, please complete the LMS course below:
Managing contact cards (≈ 20 minutes)
Once you have finished this course, return to this page and continue from Where to next? below.
Where to next?
Once you feel confident with the topics above, you can focus on managing your live grant round(s).
When you’re ready to perform assessments and communicate award outcomes, head to Assess and Decide.